Overview
Note: Ensure prior to exporting, Client’s export name, sales and freight account codes are the same in OPTO and Xero. For this example an existing Xero sales code has been used.
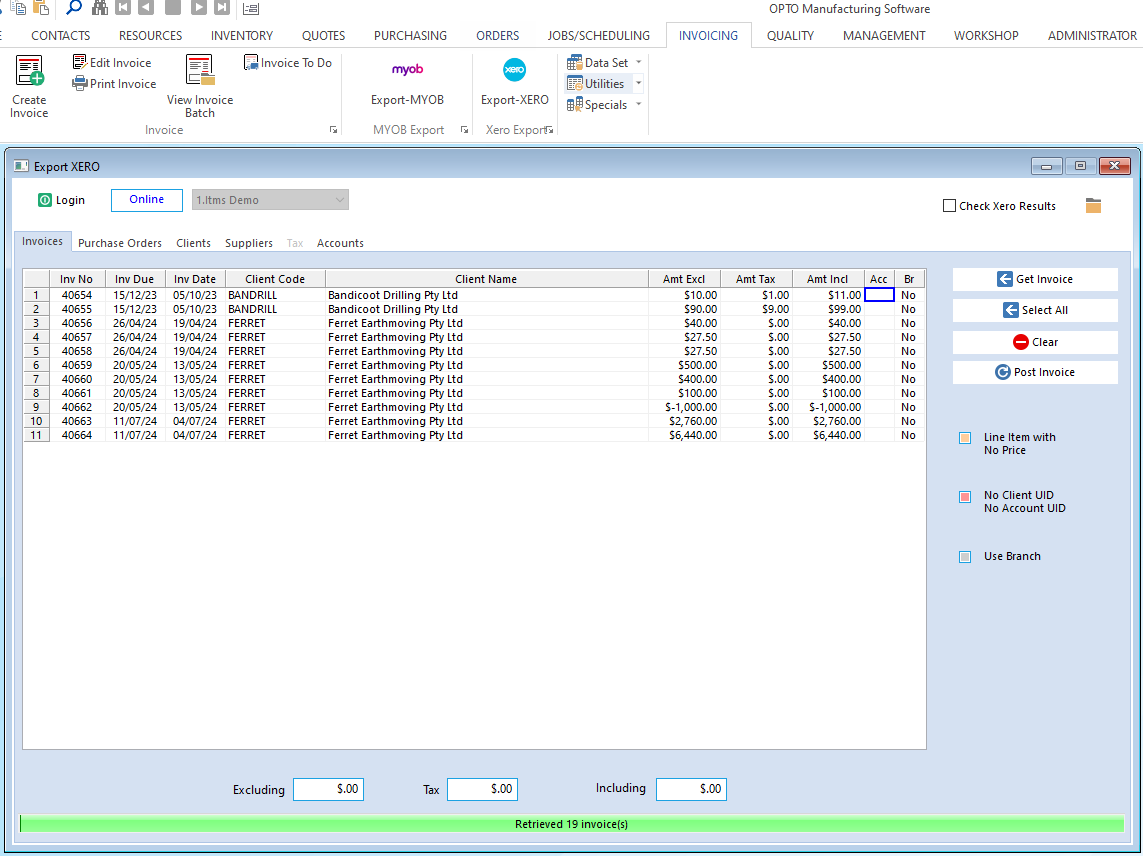
Open the INVOICING tab and select the Export-Xero icon and log onto the window with your Xero details. Click on the ‘Invoices’ tab and then click on the Get Invoice icon – wait while the list is generated.
Check any coloured entries, an Orange highlighted entry indicates that the invoice has a zero value, this is only a warning and will not stop the invoice from exporting. A Red highlighted on the invoice number indicates that there is an issue with the Client. This might be due to the client not having been exported previously so there is no UID number in the record or the UID in the client doesn’t match the card in Xero.
To open the record – do a right-mouse click on an invoice to and select “View Invoice”. Edit as required and press F9 to save. When editing is complete and saved, click on the Get Invoice icon to re-populate list and hopefully the Red highlight has disappeared.
Select the Invoices for export by dbl-clicking on the line of the invoice this will highlight the line blue. All the Invoices can be selected by clicking on the Select All icon and de-selected by clicking on Clear.
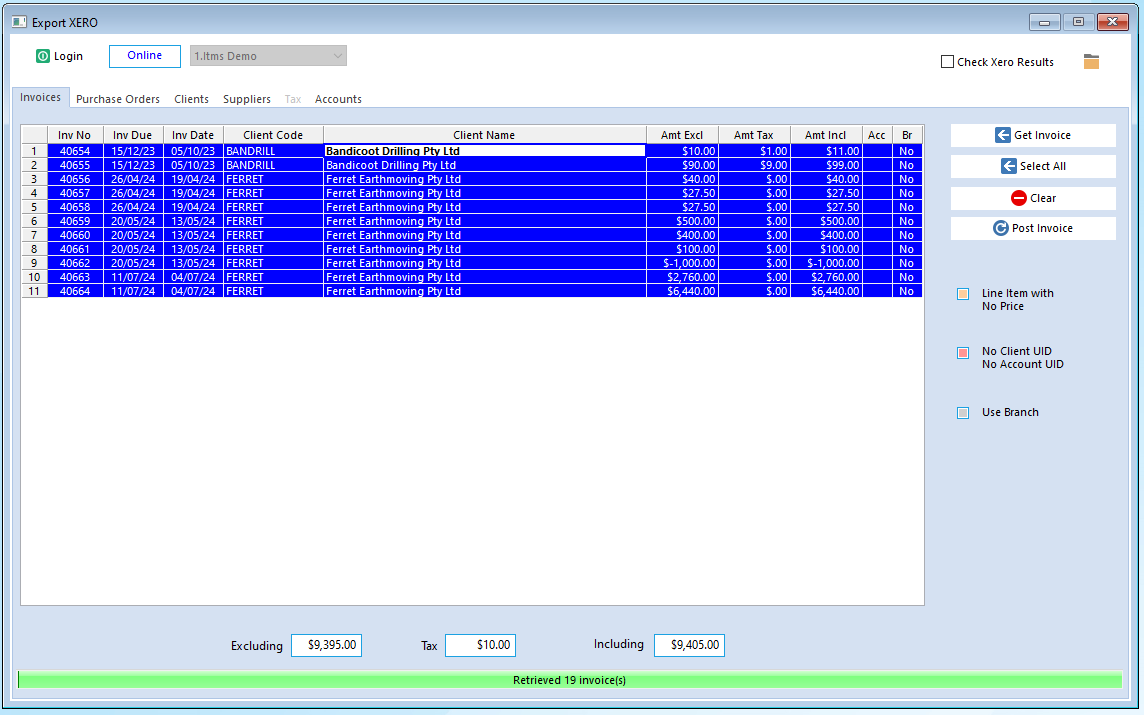
Click on the Post Invoice icon to begin the export process, a message will appear at the bottom when the export has finished. You can check the Xero Export log which is created in the OPTO\APPDATA\EXPORT folder for if any errors occurred.

Opto Software Pty Ltd
Created: 16/09/24