Overview
This document describes how to rename part codes in OPTO. Part codes may need to be renamed due to Management requests, changes to a part itself, codes entered incorrectly, etc. To be able to utilise this function the user will need to have the correct access, permission and an internal password. If renaming multiple parts, a query will have to be run and saved prior to utilising this feature. For information on Queries, please see Initiate and Run a Query within the Opto Help Files.
To Rename Part Codes
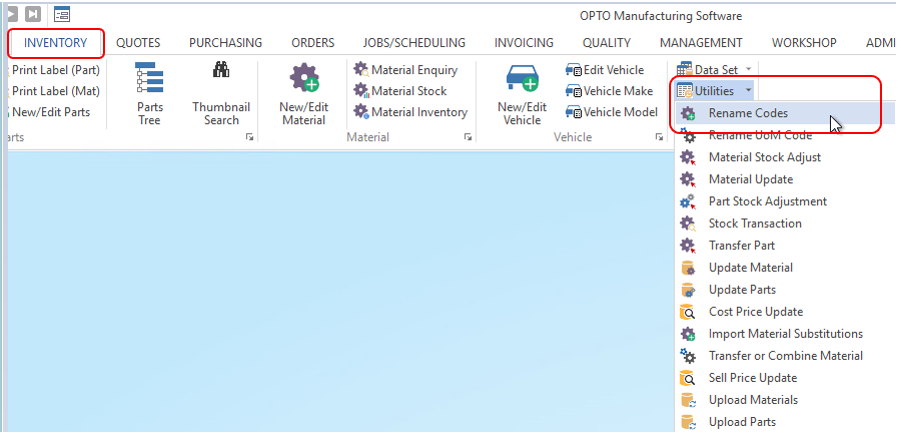
From the OPTO ribbon, select the INVENTORY tab and click on the ‘Utilities’ drop menu then select the ‘Rename Codes’ option from the list to open the ‘Rename Codes’ window.
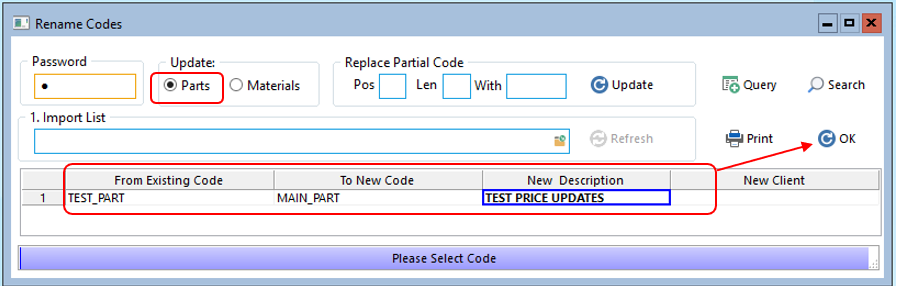
Enter your internal employee password and press <TAB> – Ensure the Part radio button is active.
To Rename a Single Part Code - Click in the From Existing Code column, type in an existing code, press <TAB> and select the parts to be re-named from the pop-up list and then click OK. Click in the ‘To New Code’ field, press <F4> to edit and type in new code and change the description and/or client code if required, and then click on the OK button to run the re-naming process.
To Rename Multiple (Partial) Part Codes – Click on the Query button and select from the previously save queries in the ‘Saved Query’ window and click OK.
Pos – This defines the starting position of the change to the code.
Len – This defines the total number of characters in the code to change.
With – This defines the character that will be replaced or added to the existing code.
For this example, we will add a prefix (PL-) to each of the part codes. Enter the changes and click on the ‘Update’ button to view the change. The user can edit the part as many times as they like using only the ‘Update’ button.
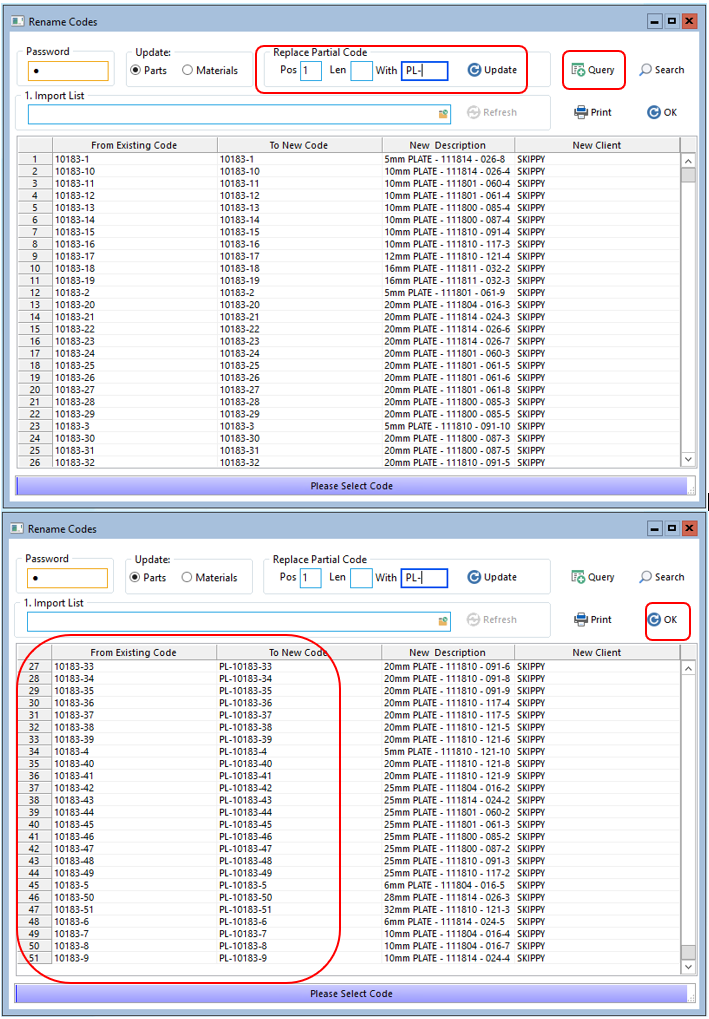
PLEASE NOTE: Only when the user is completely satisfied with the change then click on the ‘OK’ button to run the final renaming of the parts code process, close the ‘Rename Codes’ window when the process is completed.
Opto Software Pty Ltd
Revised: 13/11/2024