Overview
Job Picking is the process of moving allocated inventory parts and material to a job ticket. The internal process of picking an item for a job involves removing the allocation for the job from the item, reducing the stock level of the item, and applying the item cost to the job control record for the order
Job Picking allows the individual picking of items for the job tickets. It also allows individual quantities to be picked, this means that partial picking is possible allowing accurate inventory figures to be maintained at all times.
Job picking can also be used to reverse previous picking to send picked items back to stock. This can be used to return untouched inventory back to stock if an Order has been cancelled, or to return one or more items back to stock to allow them to be picked for a more urgent job that requires them.
Built into the Job Picking function are some safety checks to warn the user of potential problems. Only item allocations that have a quantity reserved should be picked. This ensures that there is enough stock to cover any immediate allocations for the item. If the user attempts to pick a greater quantity than is reserved for the job, a warning will flash in the Job Pick List window. Also, in order to highlight when stock is to be reverse-picked, the pick quantity will be highlighted in blue.
One limitation of the picking is that only items that have allocations against them can be picked. This means only items on the original part Bill-of-Material, or items that have been substituted for original items. If other items are to be added to a job, they need to be issued via the Material Issue function.
Using the Job Pick Function
The Job Pick function has been designed for ease-of-use. It is as simple as selecting the order and job tickets to pick, and entering the quantity of each item that you wish to pick. This is further simplified by the quantities defaulting to the remaining quantity to be picked.
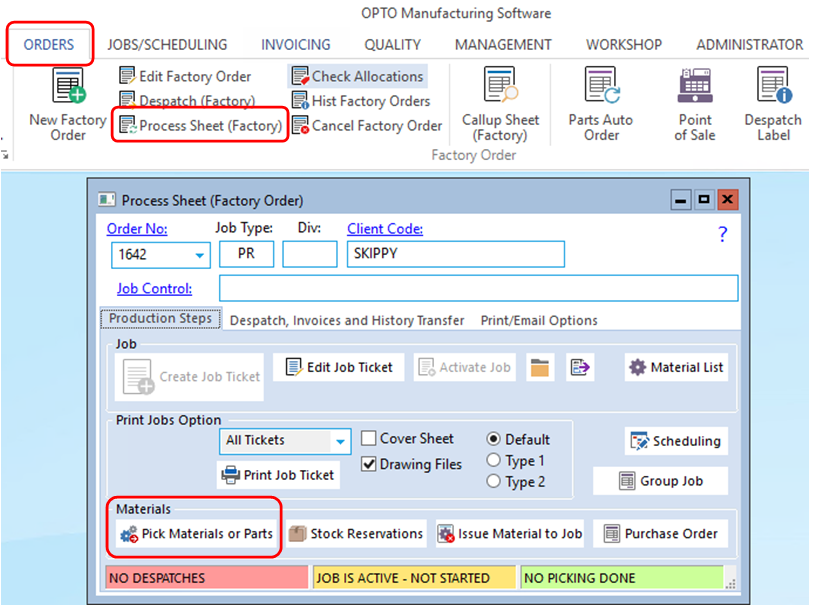
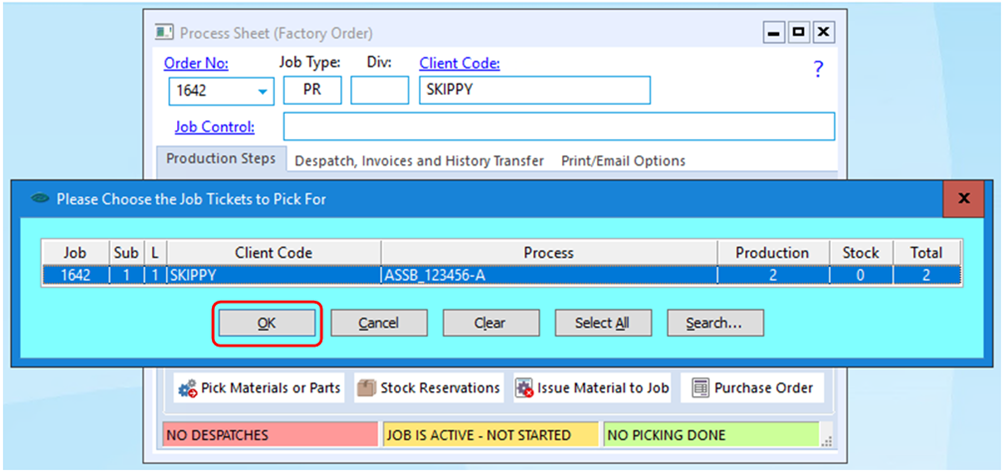
Step 1 – From the OPTO ribbon, select the ORDERS tab then click the ‘Process Sheet (Factory)’ icon. Enter the order number or press <F2> and select an order from the pop-up list. Press <TAB> to generate the window and then click on the ‘Pick Material and Sub-Parts’ button.
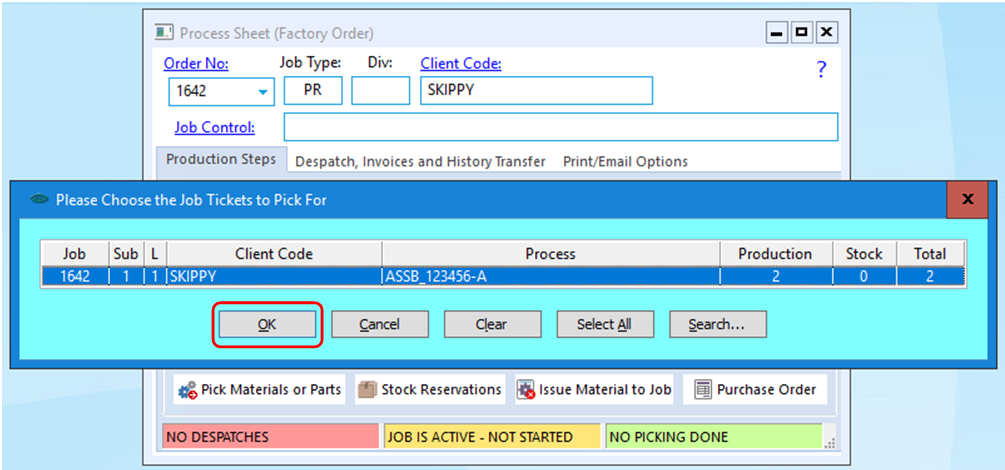
Step 2 – As the window opens a pop-up list appears displaying the job ticket/s for the order, click on the job ticket to be picked from the pop-up list and click OK.
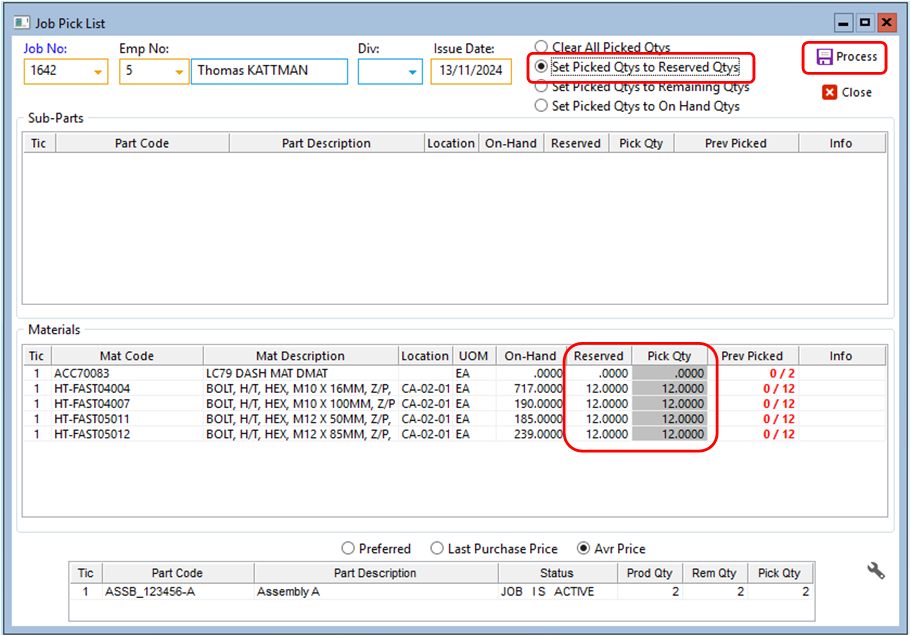
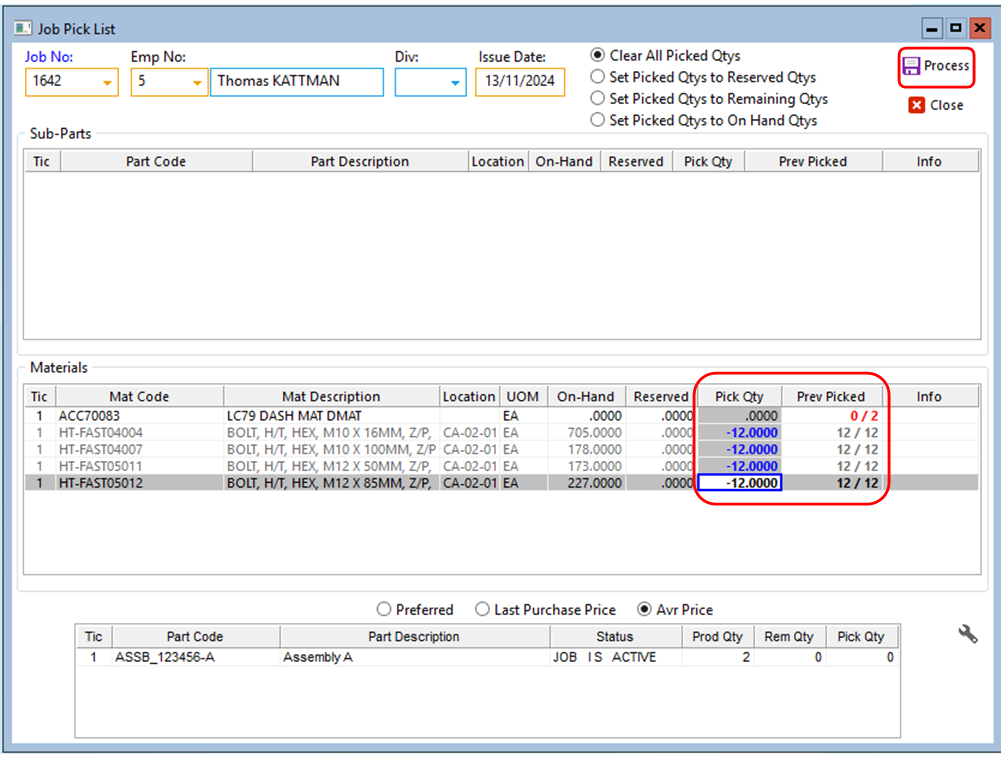
Step 3 – The Emp No. field and employee name will automatically fill with the employee linked to the user ID. Enter a division if necessary. Select ‘Set Picked Qtys to Reserved Qtys’. You will notice where there is no reserved quantity the Pick Qty is zero, that is because you don’t have any and need to purchase the material. Click on the Process icon to save. A message appears to ask if you want to print the picked list.
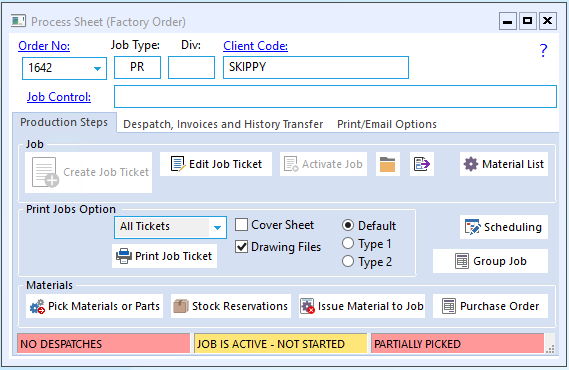
The Process Sheet (Factory now shows the order status as PARTIALLY PICKED).
Un-Pick a Job Ticket
Step 1 – From the OPTO ribbon, select the ORDERS tab then click the ‘Process Sheet (Factory)’ icon. Enter the order number or press <F2> and select an order from the pop-up list. Press <TAB> to generate the window and then click on the ‘Pick Material and Sub-Parts’ button.
Step 2 – As the window opens a pop-up list appears displaying the job ticket/s for the order, click on the job ticket to be picked from the pop-up list and click OK.
Step 3 – The Emp No. field and employee name will automatically fill with the employee linked to the user ID. Enter a division if necessary. Select ‘Clear All Picked Qtys’. In the Pick Qty column, enter the quantity previously picked as a negative number and it is highlighted blue. Click on the Process icon to save. Again, you will be asked if you want to print the material list.
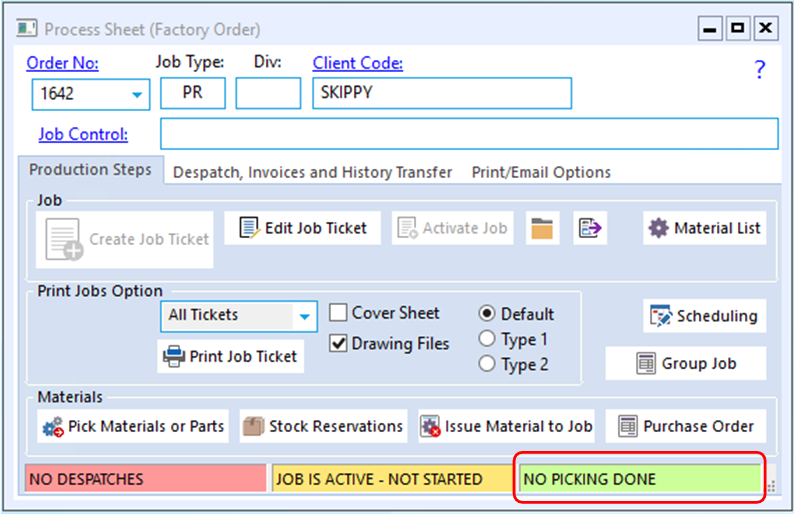
Now the order status has returned to NO PICKING DONE.
Opto Software Pty Ltd
Revised: 13/11/2024