 Helpcentre
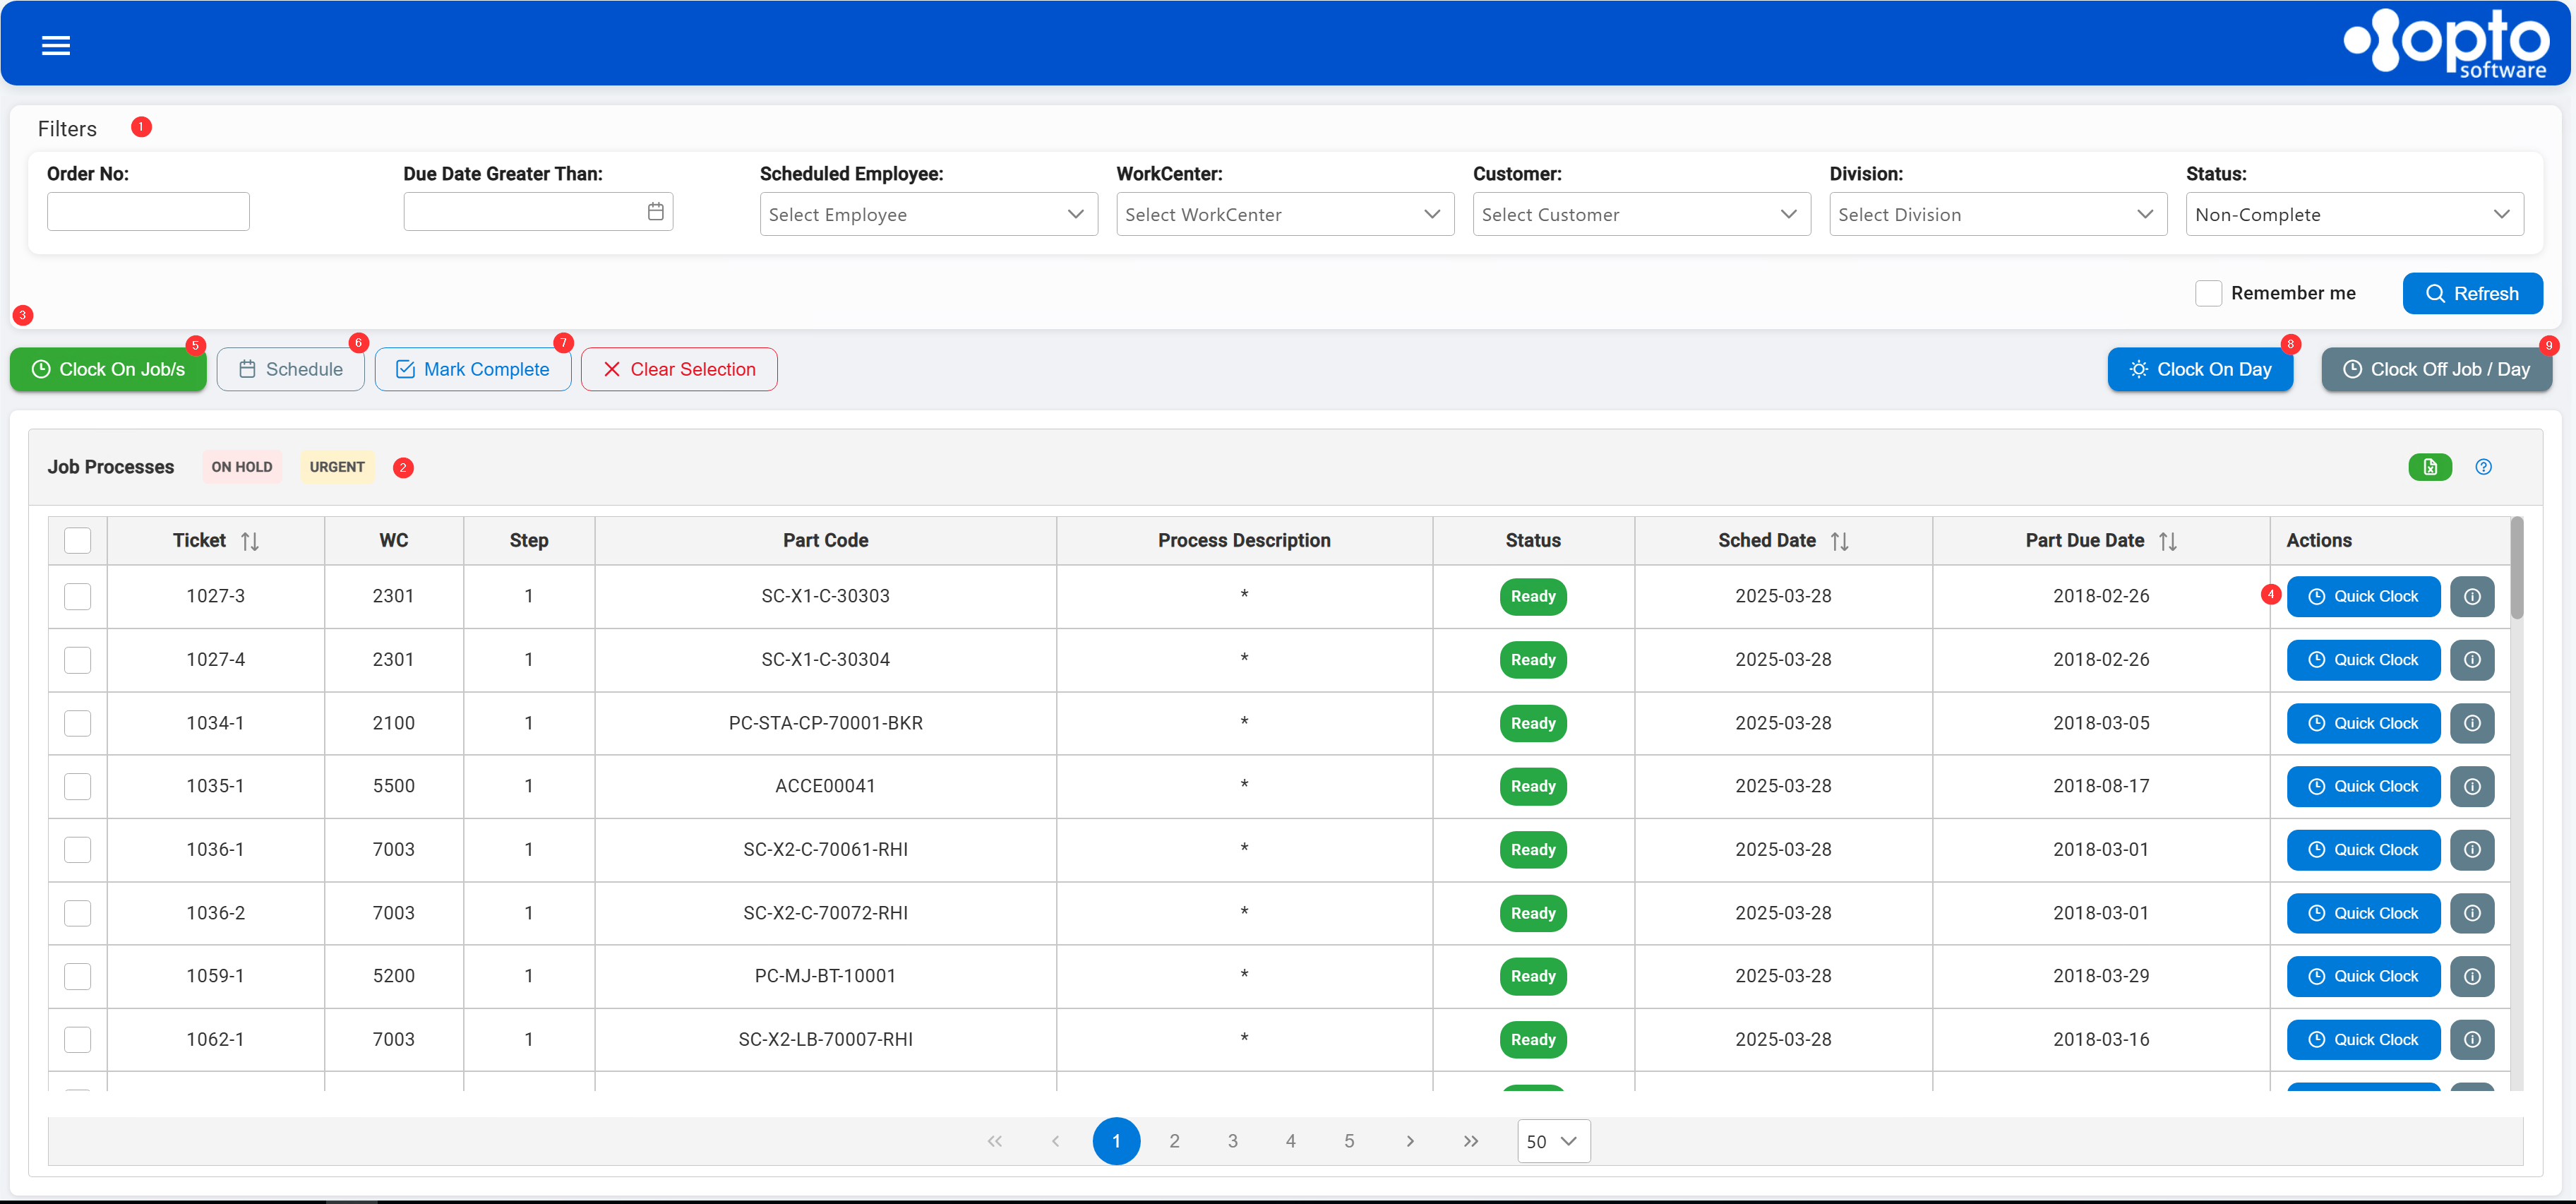
This interface allows you to filter, view, clock on/off, schedule, and mark jobs complete, all in one screen.
🔁 Automatic Data Refresh
The job list automatically refreshes every 5 minutes (300 seconds) to keep your screen up to date with new jobs, updates, and status changes. 🔄 A notification will appear when auto-refresh is active.
🔍 1. Filter Jobs
- Order No: Filter by job number
- Due Date Greater Than: Show jobs due after this date
- Scheduled Employee: Filter by who is assigned
- WorkCenter / Customer / Division: Standard filters
- Status: Filter by job status
- ✅ Remember Me: Remembers your last used employee (useful for Quick Clock on a device with a single user)
➡️ Click Refresh to apply filters and update the list.
📋 2. View & Select Jobs
- 📌 Checkboxes allow selection of one or more jobs
Legend: 🟡 Urgent jobs are highlighted in yellow 🔴 On Hold jobs are highlighted in red
⚙️ 3. Action Buttons
| Button | Purpose |
|---|---|
| ✅ Clock On Job/s | Clock on to selected job(s) |
| 📅 Schedule | Assign selected job(s) to an employee |
| ✔️ Mark Complete | Mark job(s) as done |
| ❌ Clear Selection | Deselect all |
| 🌞 Clock On Day | Clock on an employee for the start of their shift |
| 🕔 Clock Off Job / Day | Record work and clock off |
⚡ 4. Quick Clock (Fast Job Switching)
Each row includes a Quick Clock button, ideal for operators moving rapidly between jobs. How it works:
- Automatically clocks the employee off their current job
- Immediately clocks them onto the new job
- Minimizes downtime when switching tasks
- Bypasses multi-step dialogs for faster transitions
- ✅ If "Remember Me" is checked, it will auto-fill the last used employee
✅ 5. Clock On to Job(s)
- Select one or more jobs
- Click Clock On Job/s
- Choose the employee
- Click Confirm
📅 6. Schedule Jobs
- Select job(s)
- Click Schedule
- Select an employee
- Click Schedule again
✔️ 7. Mark Jobs as Complete
- Select job(s)
- Click Mark Complete
- Click Confirm
🌞 8. Clock On for Day (Shift Start)
- Click Clock On Day
- Select employee
- Click Clock On
⏲️ 9. Clock Off Job / Day
-
Click Clock Off Job / Day
-
Select employee
-
For each active job:
- Enter Qty Done and Qty Rejected
- Mark as Complete (if applicable)
- Optionally add Notes or raise an NCR
- Upload required images
-
Click either:
- ✅ Clock Off Job/s – ends selected jobs
- 📆 Clock Off Day – clocks off jobs and shift
⚠️ If any job requires images, you must upload at least one image to proceed. 🔽 The Expanded Process Window
-
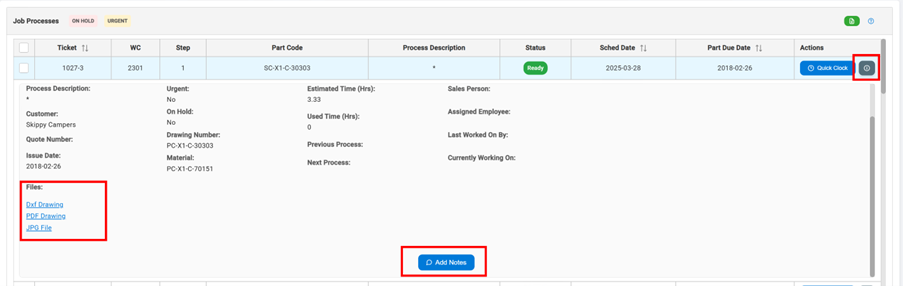
Expand rows using the i button to see details like:
- Description, customer, and material
- Estimated vs actual hours
- File attachments (PDFs, DXFs, images)
- Status and employee history
📝 10. Add Notes or Raise Enquiries
- Click Add Notes inside a job row to record internal comments
📁 11. File Previews
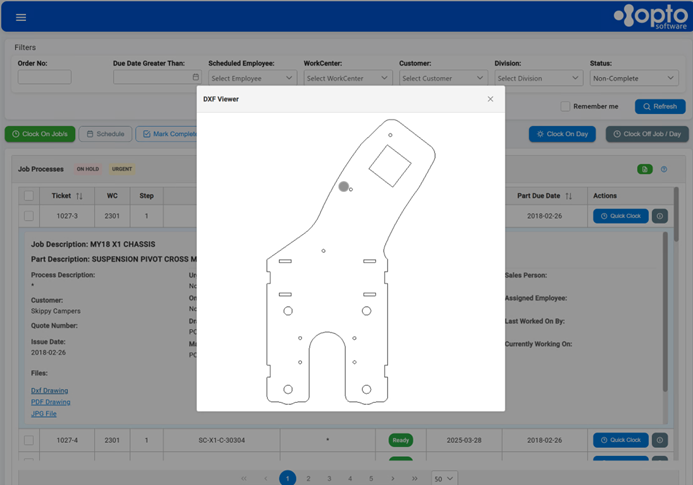
You can preview or download attached files directly from the expanded job row:
- PDF: Preview in embedded viewer
- DXF: 2D CAD preview
- PNG, JPG: Image viewer modal
- Other: Auto-download
📤 12. Export Job List to Excel
Click the green Excel icon in the Job Processes header to export the current filtered job list to a spreadsheet.