 Helpcentre
The Export XERO window is where Opto connects to Xero and prepares records for export. Use it to export sales invoices, purchase invoices, clients and suppliers, and to import account codes from Xero.
Before you start: Confirm that your organisation has configured the Xero connection and that you are authorised to export accounting records. The available company and the data shown can depend on your Opto and Xero configuration.
Open the window
Open the INVOICING tab, then select Xero Export > Export-XERO.
The same window is also available from INVOICING > Setup XERO when configuration is required. Sign in to Xero when Opto asks you to do so, then confirm that the status shows a successful connection before continuing.
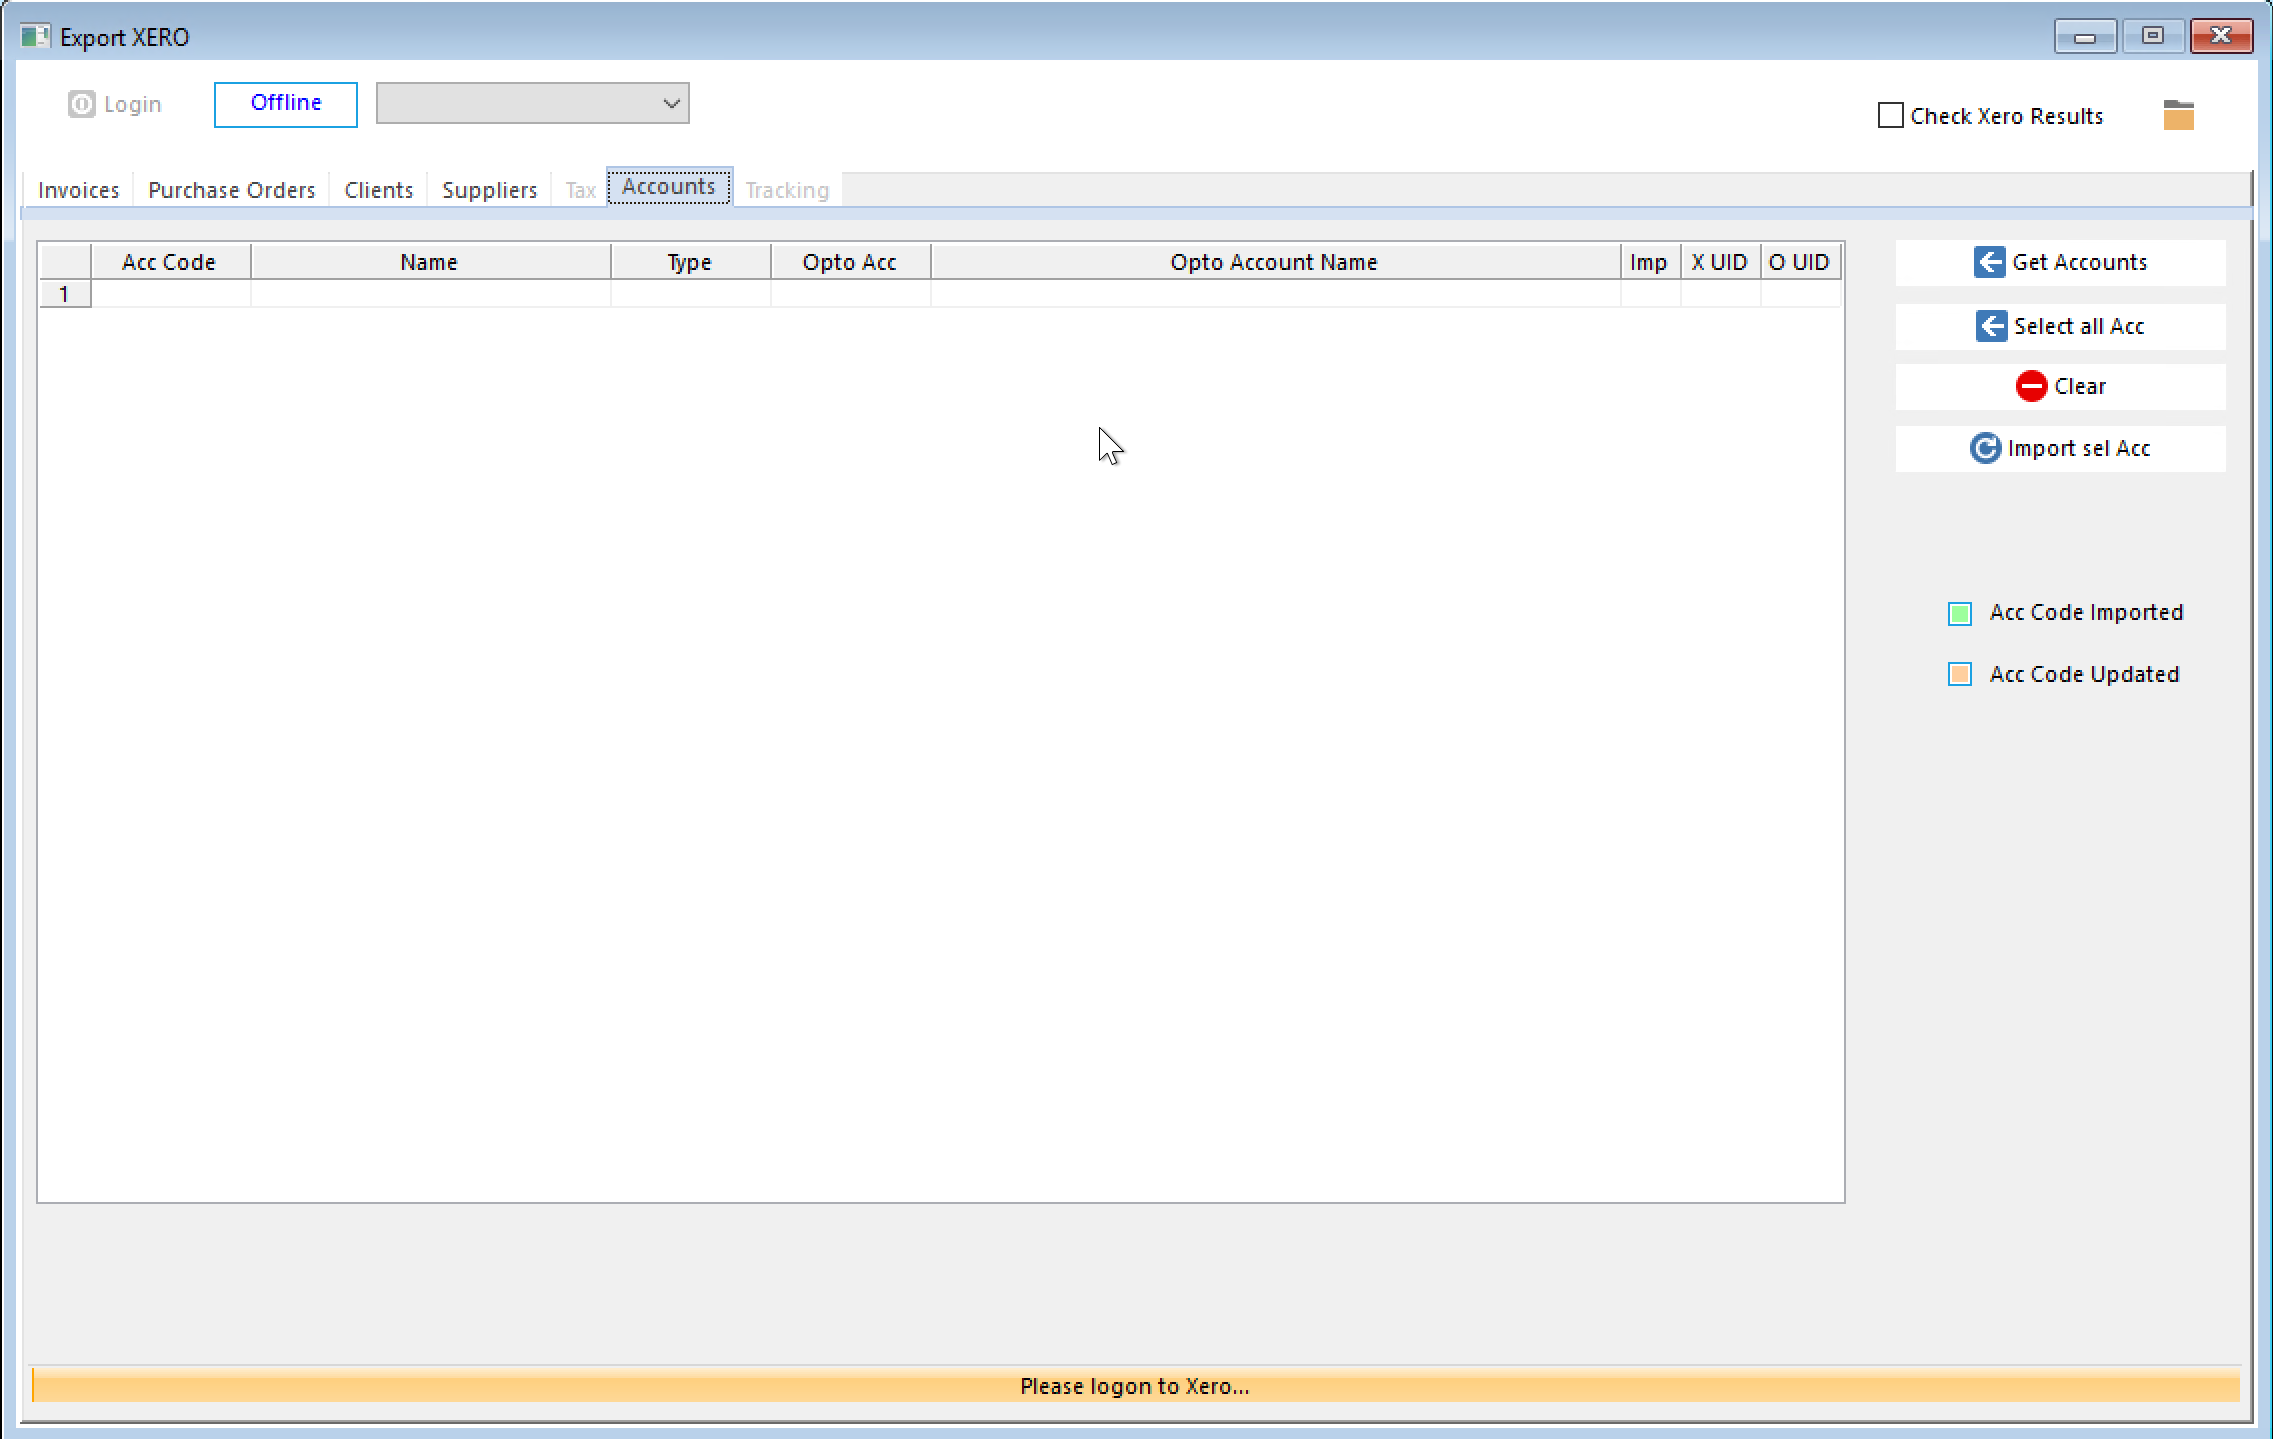
Across the top of the window are the Login button, the connection status (Offline until you sign in), the Xero company box, the Check Xero Results tickbox and a folder button that opens the export log folder. Below them, the window has a tab for each kind of record.
The tabs
- Invoices: Retrieve sales invoices waiting to be exported, select the required records, and post them to Xero.
- Purchase Orders: Retrieve purchase invoices or purchase orders waiting to be exported, select the required records, and post them to Xero.
- Clients: Find client records that need to be exported and post selected clients to Xero.
- Suppliers: Find supplier records that need to be exported and post selected suppliers to Xero.
- Accounts: Retrieve Xero account data and import or link account codes in Opto.
The Tax and Tracking tabs are shown but are not available for use.
Export sales invoices
- Select the Invoices tab.
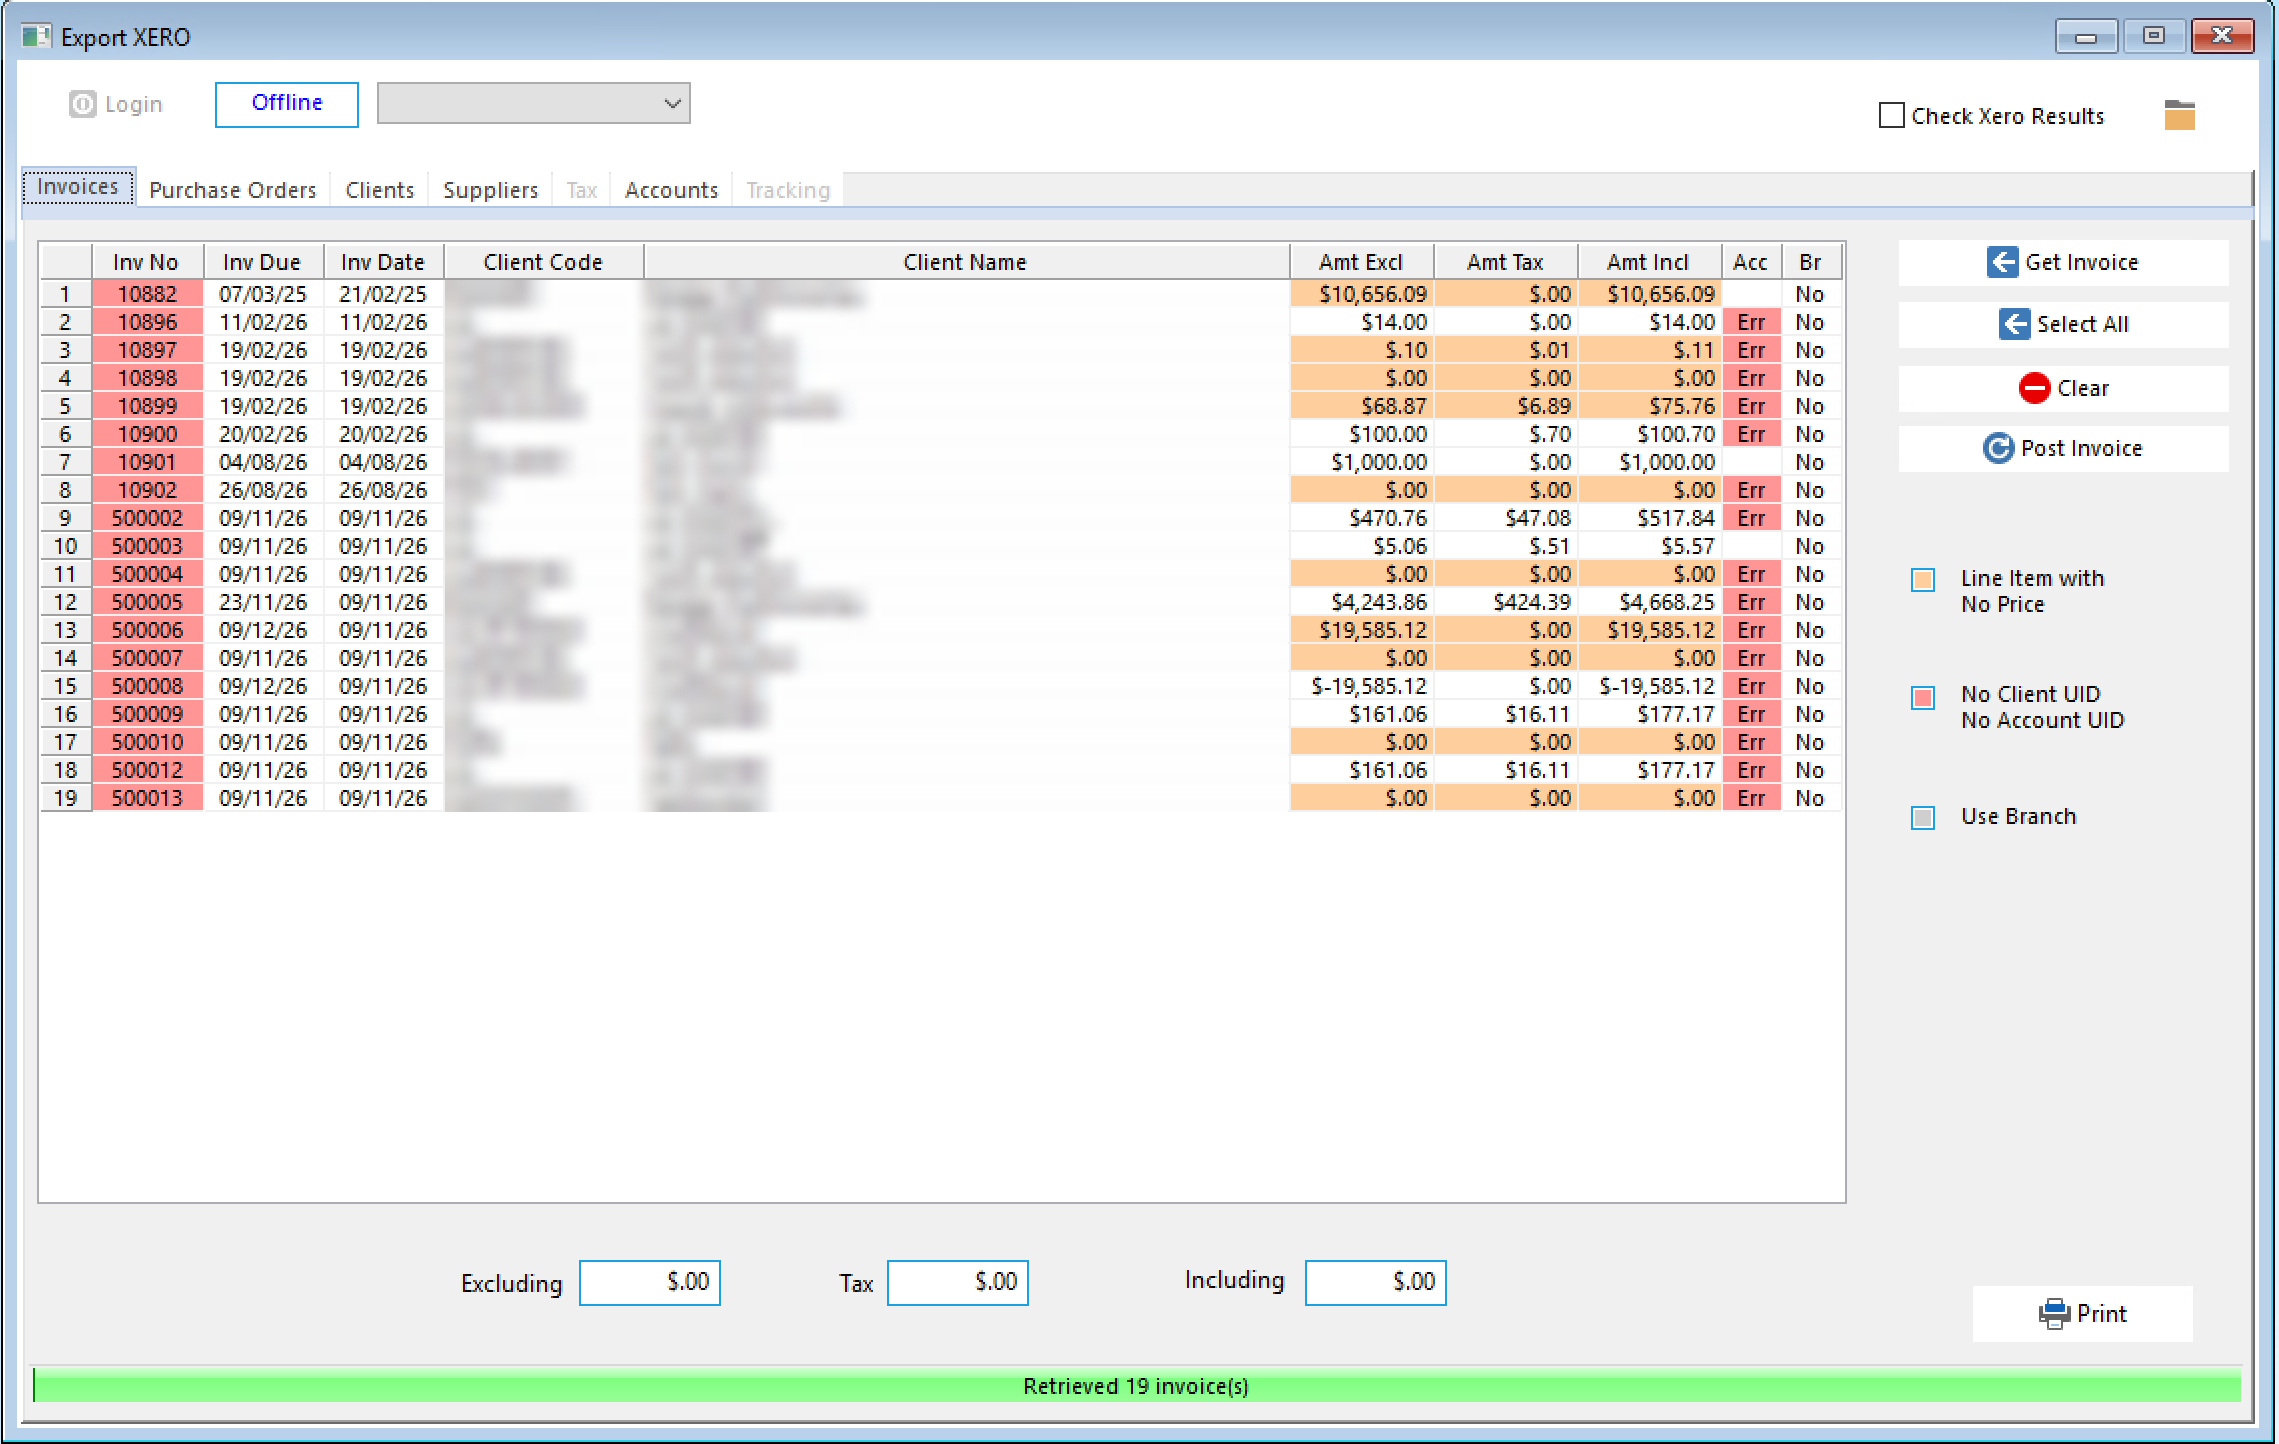
- Select Get Invoice to build the list of sales invoices available for export.
- Review the list before selecting records. Cells are coloured using the legend beside the list:
- The amounts are coloured for Line Item with No Price.
- The Inv No is coloured for No Client UID: the client has not been linked to Xero yet.
- Err in the Acc column means at least one invoice line uses an account code that is not linked to a Xero account yet. Import it on the Accounts tab.
- Br shows Yes, and the client name is coloured, for Use Branch invoices.
- Select individual invoices, or use Select All only after you have checked every record that will be included.
- Select Post Invoice to send the selected invoices to Xero.
- Check the status message for each record. A successful export is reported in the status bar; failures are reported there as errors.
If a record needs correction, right-click it and select View Invoice to open the invoice. Save the correction, then retrieve the list again before posting. For the detailed procedure and common invoice-list warnings, see 2009-302 - Export Sales Invoice to Xero.
Export purchase invoices
- Select the Purchase Orders tab.
- Select Get Purchase to build the list of purchase records available for export.
- Review the list and correct any missing supplier or account information before selection.
- Select the records to send, then select Post Purchase.
- Review the status message for successful exports or errors.
You can right-click a purchase record and select View Purchase to open it for correction. For the detailed procedure and warning guidance, see 2009-303 - Export Purchase Invoice to Xero.
Prepare contacts and accounting data
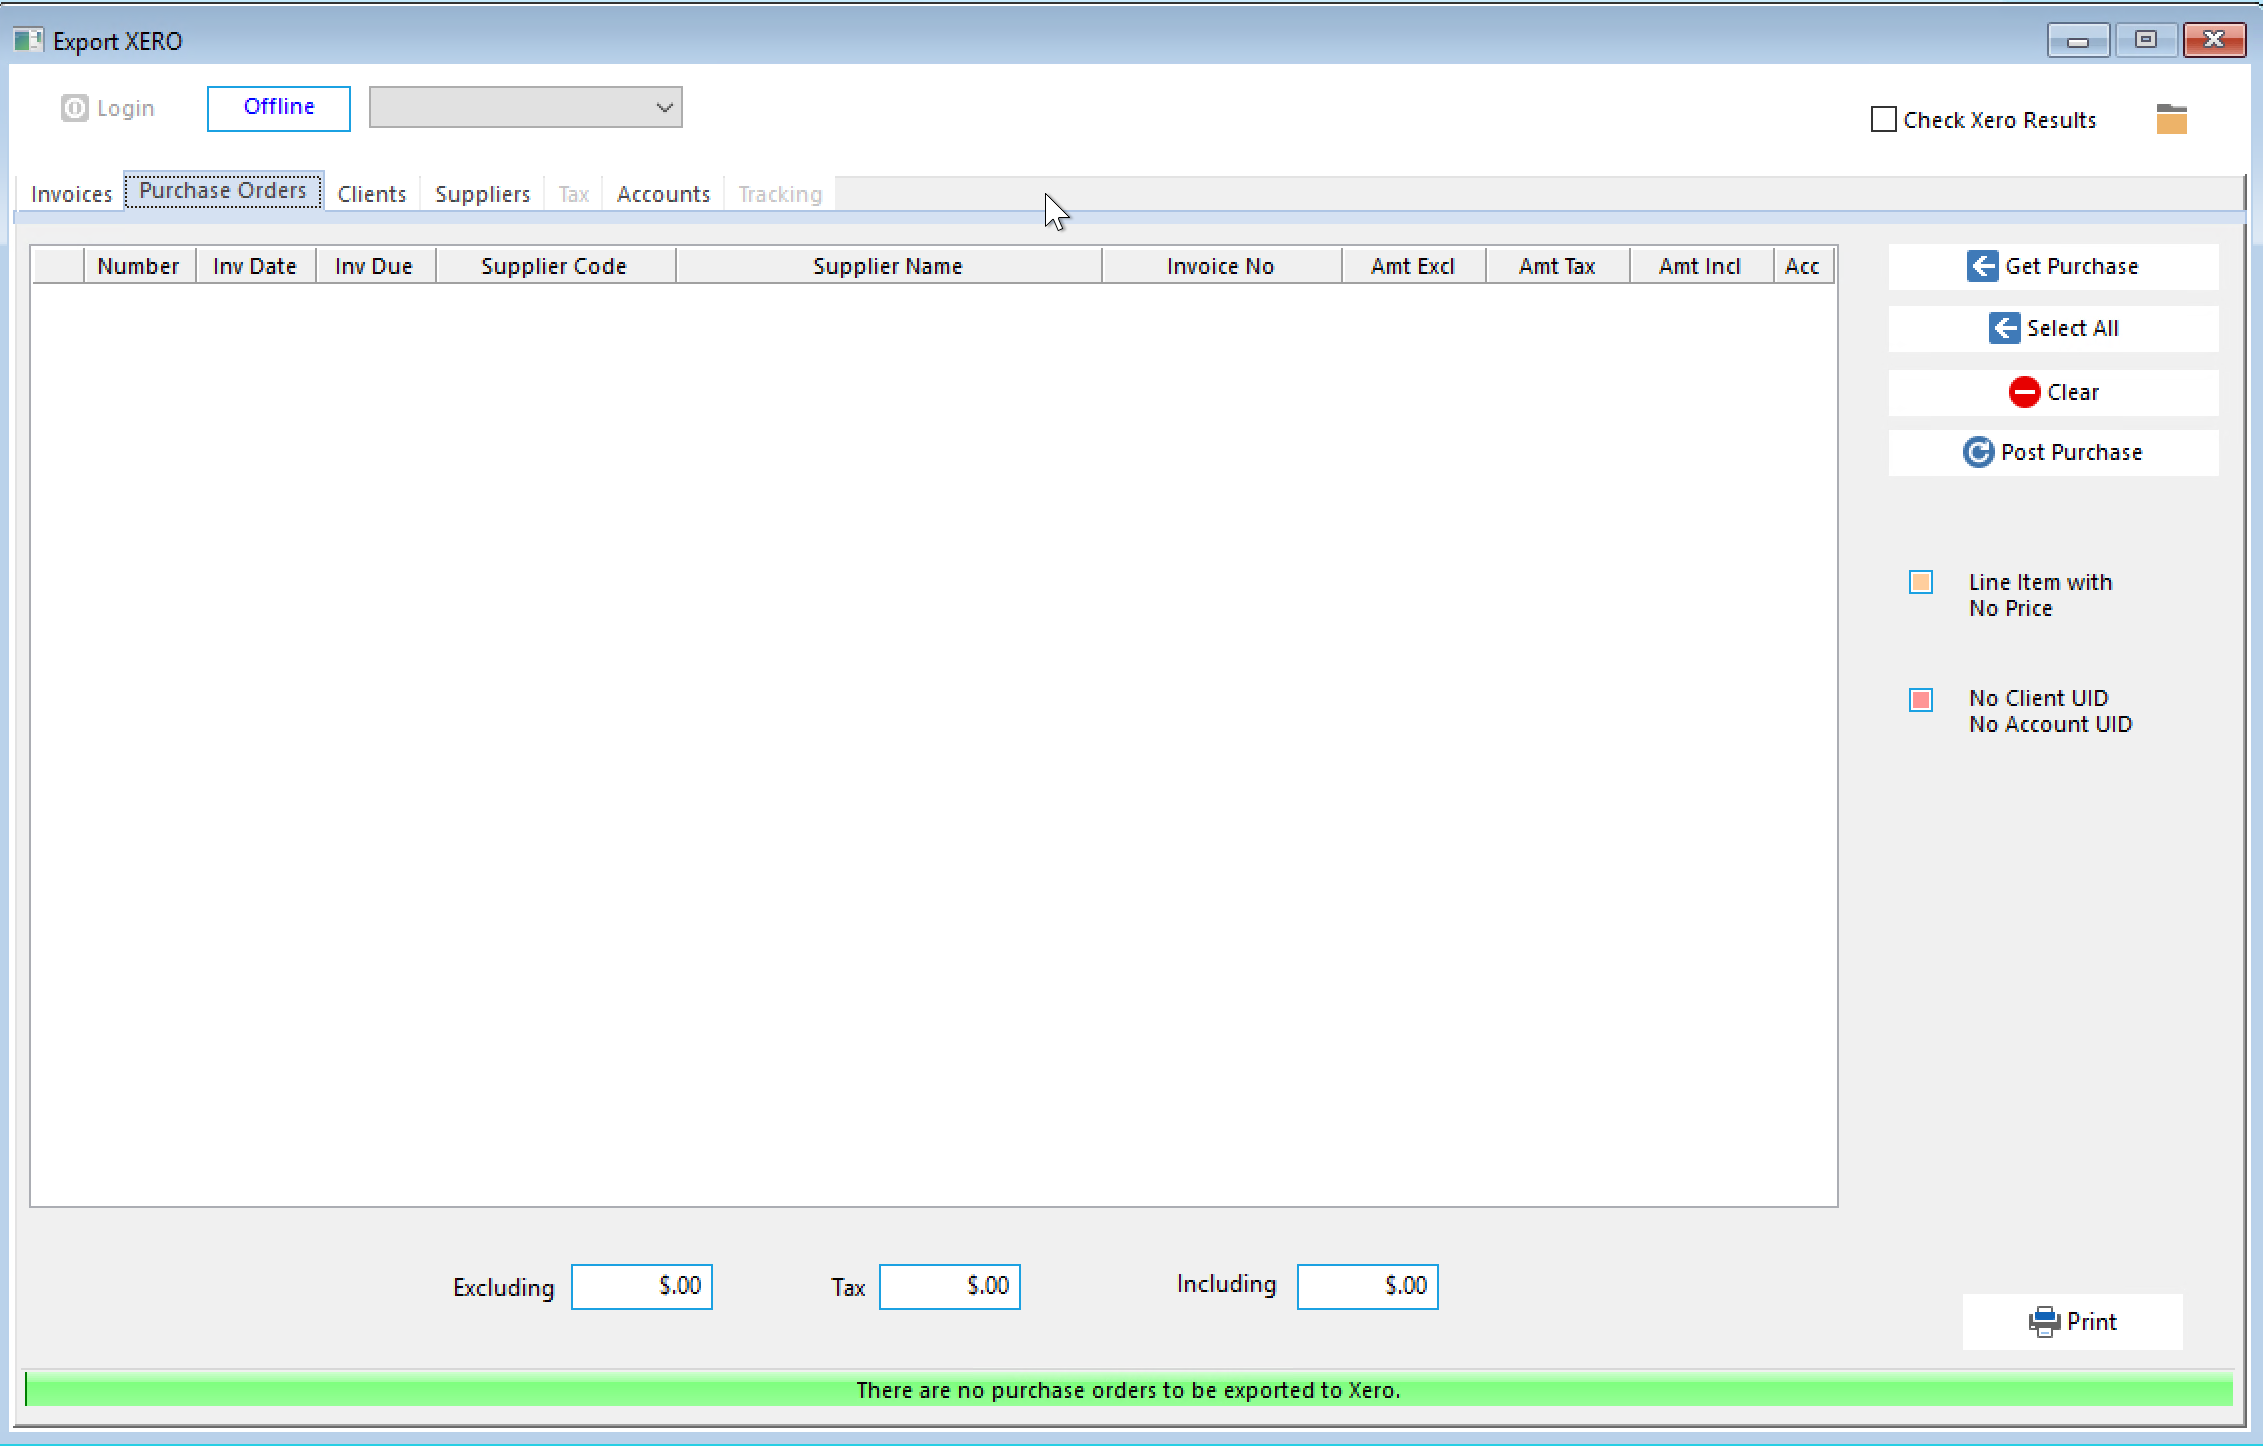
Export clients and suppliers before exporting invoices that rely on them. On the Clients tab, select Get Clients, select the clients required, then select Post Clients. The list at the right shows the clients on the retrieved invoices that are not yet linked to Xero; select Get Missing Clients to load them into the main list so you can post them. The Suppliers tab works the same way. Opto records a Xero UID against successfully matched or exported contact records; a missing UID can prevent an invoice from being exported.
Use the Accounts tab to retrieve the Xero chart of accounts when setting up the integration or after adding accounts in Xero. Select Get Accounts, select the accounts required (or Select all Acc), then select Import sel Acc. Imported and updated account codes are coloured as shown in the legend.
For related procedures, see:
- 2009-300 – Import/Link Account Codes with Xero
- 2009-301 – Post Clients/Suppliers to Xero
- 2009-102 - Setup Freight Account Code for Invoice Export
- 2002-400 – Head Office & Branch Function for Exporting to MYOB/Xero
Check problems safely
- Do not post records flagged with missing client, supplier or account identifiers until the underlying Opto record has been reviewed.
- Use the relevant right-click View action to inspect the source record, correct it, save it, then retrieve the export list again.
- Use the folder action in the export window to open the configured export-log folder when you need technical detail about a failed export. The folder location is environment-dependent.
- If Xero authentication, company selection or export errors persist, retain the error detail and contact Opto Support or your system administrator rather than repeatedly posting the record.