Overview:
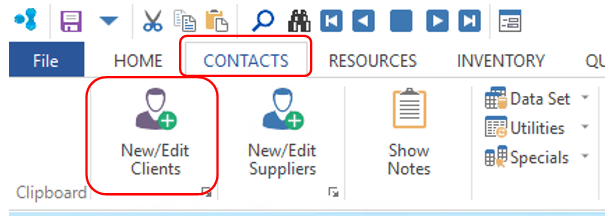
To enter a new client – click Contacts tab from the Ribbon, then select New/Edit Clients.
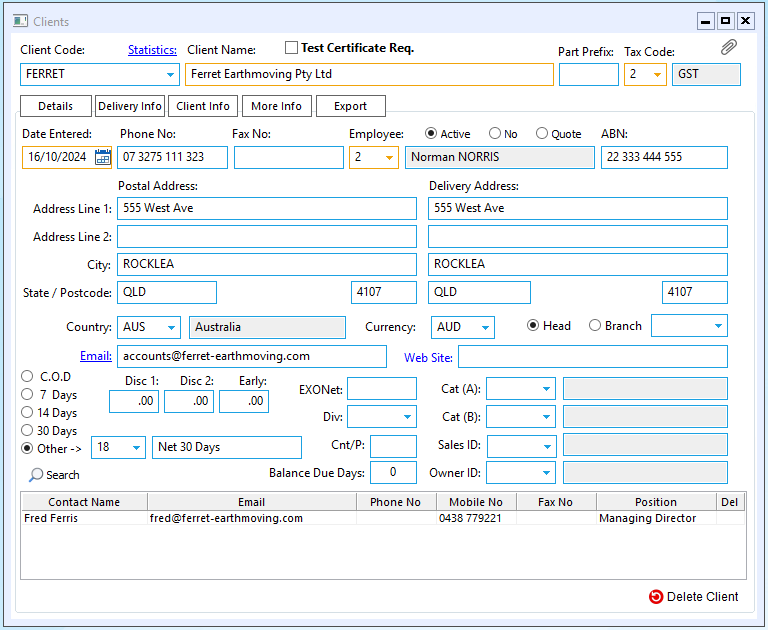
In the client code field, enter a code for the client and press <TAB> to advance to Client Name, type in the name of the new client. Press <TAB> to move on to the information boxes to enter the date, client’s phone and fax number, and the client’s A.B.N. information. The “Employee Name” field defaults to the employee number assigned to the USER number who is logged onto OPTO and is entering the Client’s information. Ensure to click on the ‘Active’ box to make the new client active. Select the payment terms for the client by clicking one of the radio buttons, and continue completing the client’s details, press <F9> to save to save the record.
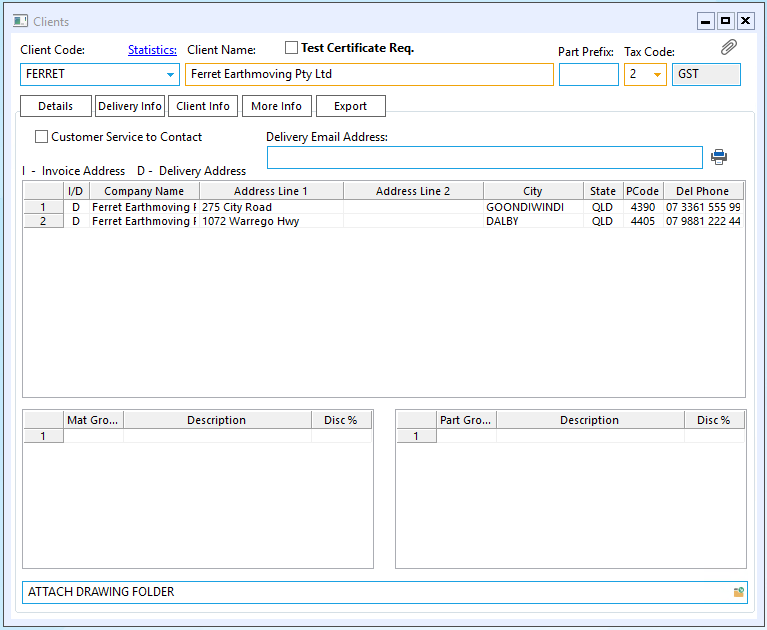
Delivery Info tab enables the USER to record alternate delivery and invoice addresses for the client. Materials and Parts Groups for this client can also be recorded as well as any discounts that may apply.
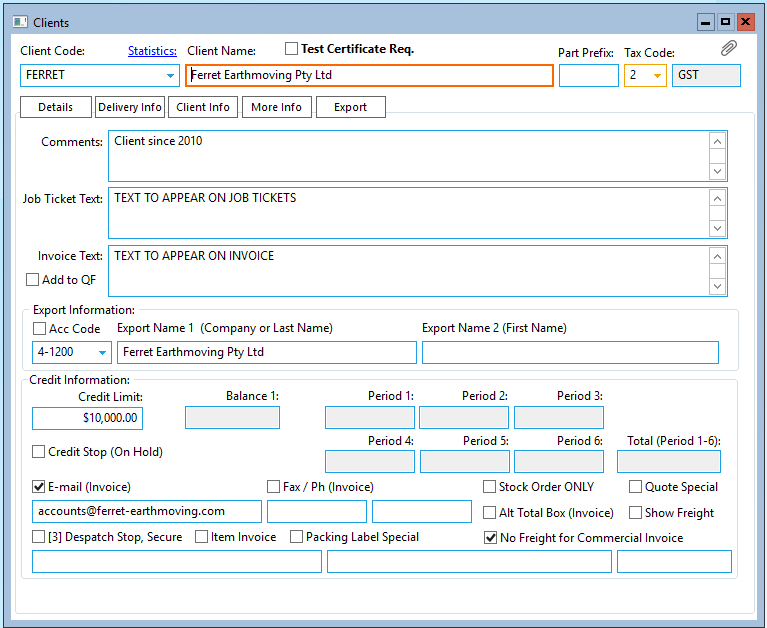
The Client Info tab enables the USER to record text that can be displayed on job tickets and invoices for that client. The Client’s ‘Export Name is automatically generated when the client name field is completed and the record is saved. This is the name that is used when invoices are exported to your accounting system. The Export Name MUST be identical to the corresponding client record in your accounting system.
The Credit Information fields enable a credit limited to be applied to a client and a Credit Stop (On Hold) function if they should exceed their credit limit (See Credit Stop and Credit Limit function).
The email (Invoice) and Fax No (Invoice) boxes records the client’s preference in relation to how they are to receive their invoices, click to tick the selected method box and enter email address or fax number. If the client wishes to have their invoices to be delivered via the post, leave these boxes un-ticked. The (3) Despatch Stop Secure feature is to prevent un-authorised despatches to designated clients, or will prevent a despatch unless authorised by employee password. (See Set-up Despatch Stop, Secure by Client)
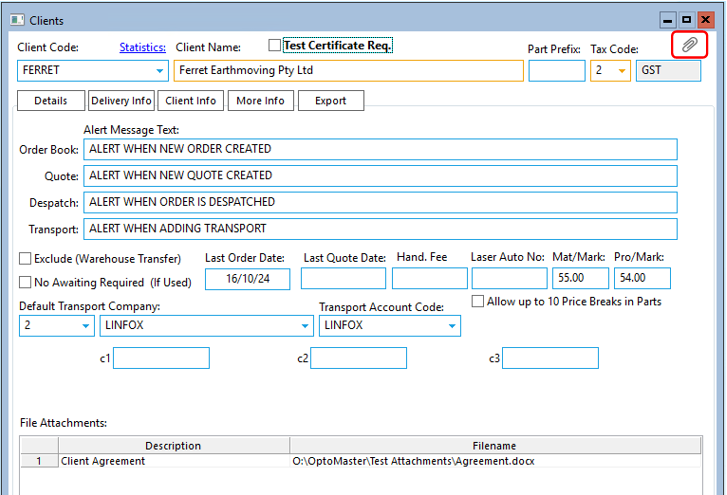
The More Info tab has areas to record Alert Message Text for the order book, quotes, despatches and transport information. To select the Default Transport Company press <F2> and select from the pop-up list, click on OK. The File Attachments area enable the USER to attach files in relation to the client, this could be copies of credit agreements, profile of the client’s company, delivery instructions, etc. To attach a file in this area, click in the Description area and type in a description of the file, then press <TAB> to move on to the Filename field and press <F2> to browse your computer for the file you wish to attach. Click on the file name to highlight and click on Open button, the file name and path are now stored in this area. To view the attached documents, click on the paper clip icon (circled below) and select from the list.
Opto Software Pty Ltd
Revised 08/11/24
