IMPORTANT NOTE: Employee records in Opto should never be recycled or deleted. When an employee leaves a company, their employee record is made ‘Inactive’.
To create a New Employee record – access the employee setup via the RESOURCES tab on the Opto Ribbon.

Details Tab
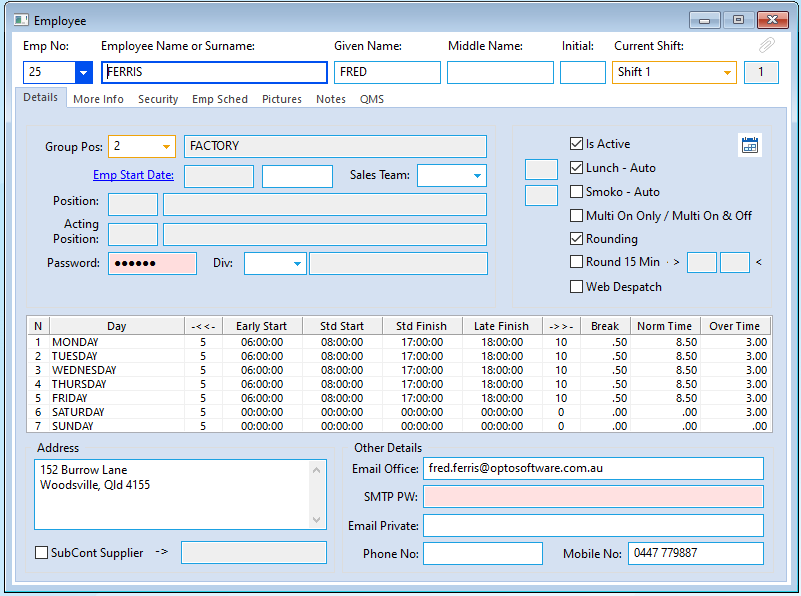
Click on the New/Edit Employee icon to open the ‘Employee Details window’ – In the “Emp No” field and enter the code/number for the new employee, press <TAB> to advance to the “Employee Name or Surname” field and enter the name/s for the employee. Select the shift number from the “Current Shift” drop-down list and press <TAB>, the shift details will fill the data table. Click in the “Group Pos” field and click on the drop-down arrow or press <F2> and select from the list then click OK.
Click in the ‘Is Active’ box to tick. The “Lunch- Auto” and “Smoko-Auto” tick boxes refer to the break times within the selected shift that are automatically recorded each day. The “Multi On-Only / Multi On & Off” refers to clocking onto jobs – please see Help File 2012-102 – Multi Clock on function – Parameters & Options for more details. The Rounding fields refer to rounding off of start and finish times when clocking on or off, this is also set up in the shift parameters.
Enter a unique internal employee password for the employee if applicable for accessing secure functionality and protected features within Opto. This internal employee password must be unique to the employee and cannot be shared with other employees. Enter the address details and email addresses for the new employee. Press <F9> to save the entry.
More Info Tab
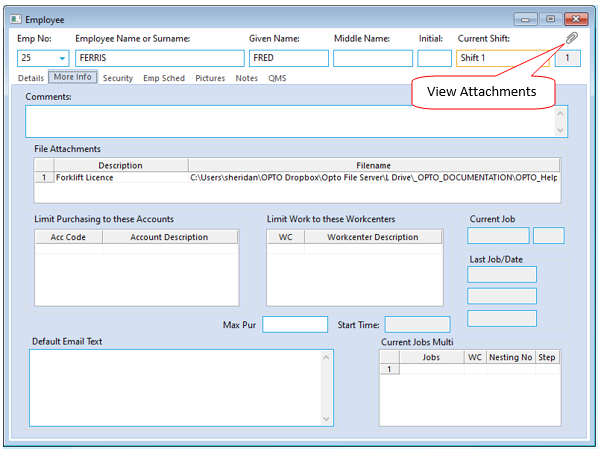
The More Info tab is used for storing additional information in relation to an employee. The Comments area may be used for recording important information such as emergency contacts, health/allergy information and qualifications. The USER can attach documents to the employee record such as employment contracts, certificate, etc. which can be viewed by clicking on the Paperclip icon – see below. The “Limit Purchasing to these Accounts” and “Limit Work to these Workcenters” areas are used to limit access within these areas. To enter information in these areas, click in the first column of the tables and press <F2> and select from the pop-up list then click on OK. A “Max Purchase Amount” can also be set for the employee. Press <F9> to save the entry.
The “Security” Tab is used to set security options and permissions for the employee in regards to Client Orders, Production Order, Invoicing, Reports and inventory management and tracking. The employee’s Rates may also be entered on this tab. Press <F9> to save the entry.
The “Emp Sched” tab may be used schedule job to the employee.
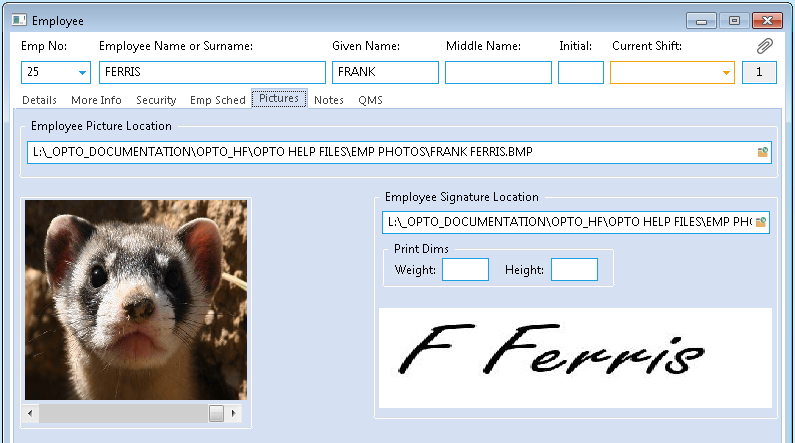
The “Pictures” Tab enables the USER to attach a picture of the employee and a copy of their signature, these files must be stored in the OPTO\AppData\PICS folder. The employee picture and signature will display on this tab after the record has been saved and re-opened. Press <F9> to save the entry.
The “Notes” and the “QMS” Tab displays information in regards to Quality Management including Non-Conformance reporting.
Employee Calendar Activities
Overview:
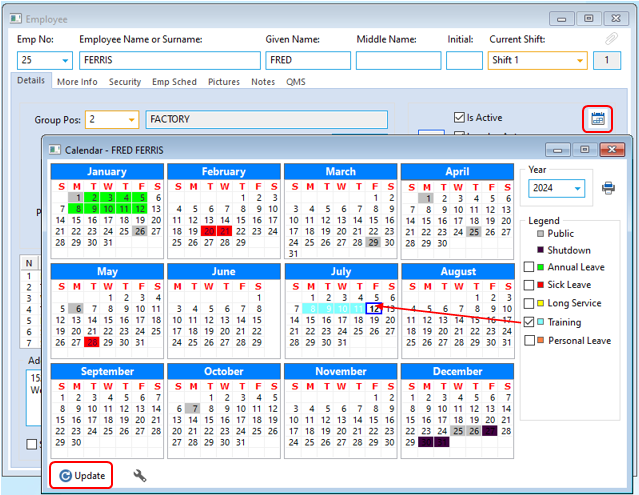
The Employee Calendar can be used to record activities like Annual and Long Service Leave, Sick Leave, Rostered Days Off, Training, etc. The USER must have ADMIN access or be logged onto OPTO as the USER: admin to be able to complete this set-up. Public Holidays and Christmas/New Year Shut Downs are displayed on the calendar and are set up in the Year Calendar window on the ADMINISTRATOR tab.
Individual Employee Calendar Setup
Open the RESOURCES tab and select the ‘New/Edit Employee’ icon. Enter an employee number or press <F2> and select an employee from the pop-up list and then click OK. Click on the Employee Calendar button – see circled below. With the calendar window open, tick the box for the leave type on the right such as Training and then click on the required dates for the activity and then click on the ‘Update’ icon.