Overview:
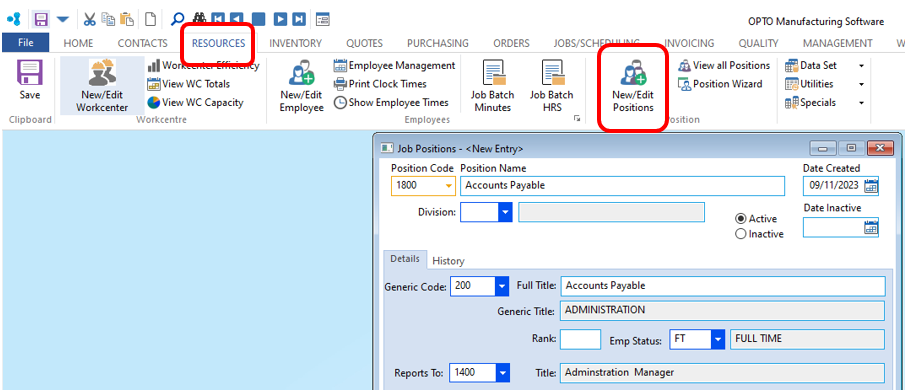
The ‘New/Edit Positions’ feature enables the user to enter all the positions within a company, create more positions, and edit current positions. The positions created by this feature are allocated to employees via the ‘Position Wizard’.
To Set-up Job Positions
From the OPTO ribbon, select the ‘RESOURCES’ tab and click the ‘New/Edit Positions’ icon to open the Job Position window. Click in the Position Code field and type in the new position code, press <TAB> and type in the Position Name field press <TAB> again to move to the Date field which has been automatically filled or type in the required date. Press <TAB> to move to the next field and press <F2> to select a ‘Division’ if required. Click in the Generic Code field, press <F2> select from the ‘Generic Title’ pop-up list, click OK, then press <TAB> to advance to the Emp Status field. This field is in relation to the position not the employee, (Is the position fulltime, part-time, etc), continue to the Reports to field and save.
To Link a Position Document if required – The documents used for this feature must be linked to the Document Management feature of the ‘Quality’ functions for Opto. See ‘Create New Document Record’.
Click in the Position Doc ID field press <F2> and select the document from the pop-up list, click OK.
Press <F9> to save entry.
To Edit a Current Position
Click in the Position Code field, press <F2> to select the position code of the position you wish to edit from the pop-up list, click OK. Press <TAB> to generate the window. Press <TAB> to move to through the fields and make required changes and then press <F9> to save.
Managing Positions
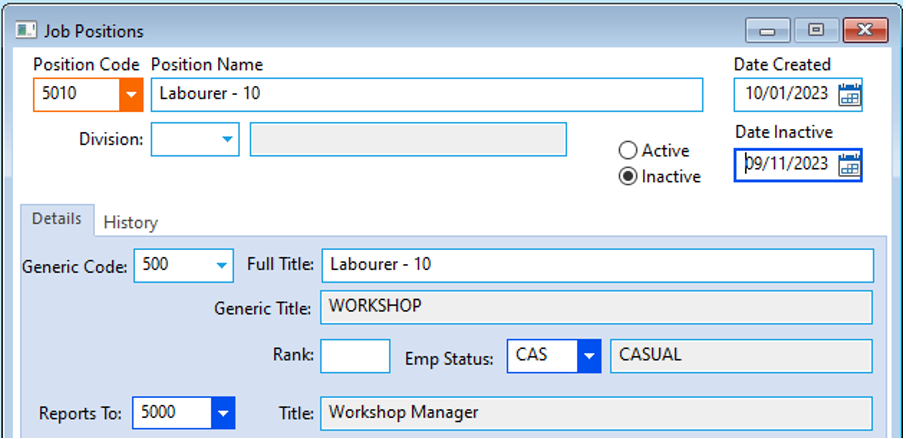
An unassigned position can be made inactive if required so it may be use at a later date or is no longer used within the company. Positions no longer in use are made ‘Inactive’ and not deleted as the position has related information recorded against it that may be used for audits, reports and history records.
To make a Position Inactive
Open the ‘Job Positions’ window and bring up the position for editing, click on the Inactive radio button. Enter a date if required and then press <F9> to save. To make the position active again, open the position as above, click on the Active radio button, delete the Date Inactive field if required and press <F9> to save.
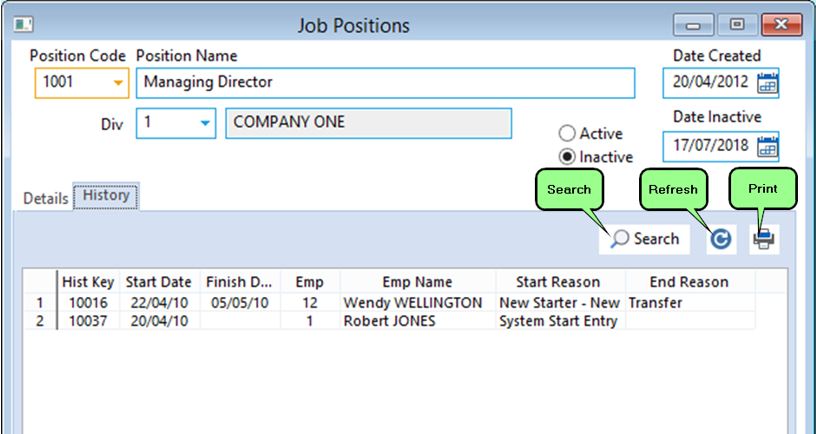
The ‘History’ Tab
Tracks the history of the position, who held the position and the dates the employee was assigned that position. The History Transaction List for the position can be searched and printed by clicking on the relevant icon.
Opto Software Pty Ltd
Created:09/11/2023