Overview
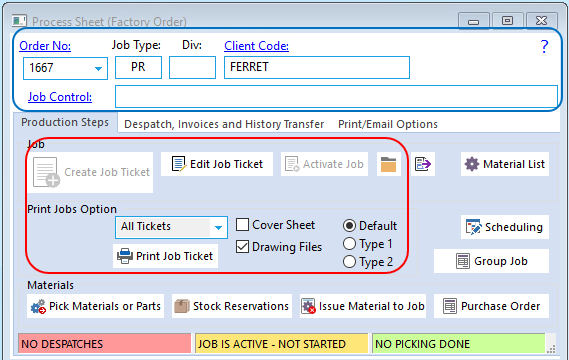
A New Factory Order has been created to demonstrate the course of action for the Process Sheet (Factory Order) window. The Process Sheet (Factory Order) has 3 tabs, the Production Steps on the first tab, the second has the Despatch, Invoice and History Transfer functions and the third has the Print and Email options. The icons are coloured when they are active and are greyed out when the step has been completed. The message pane on the bottom of the Process Sheet (Factory Order) window displays the status of the order throughout this process. There are also blue hyperlinks to view the Factory Order, the Client and the Job Control windows. The blue Question Mark in the top right opens a copy of this document from our on-line Opto Help Centre.
After creating a new factory order the first step is to create the job tickets – click on the ‘Create Job Ticket’ icon, the job tickets are created and activated. The ‘Create Job Ticket’ and Activate Job icon are now greyed out and all the other icons are active. The job ticket can now be printed or edited.
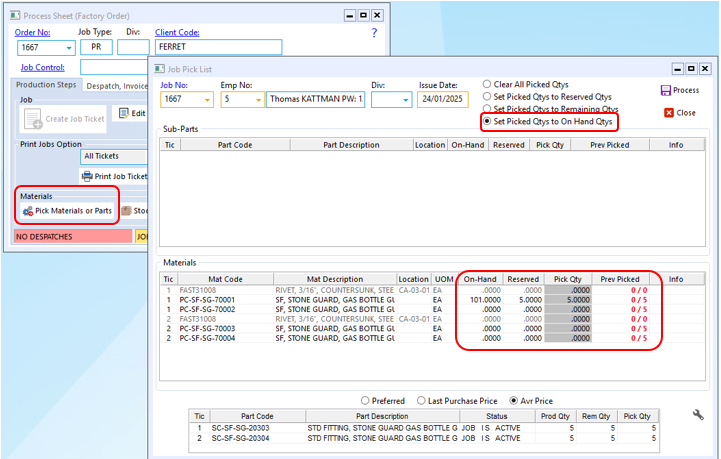
The next step in the factory process is to pick the materials and/or sub-parts and issue then to the job. For this example, the picking window is set to pick materials with on hand quantities., there is only 1 material to pick. The other materials will need to be purchased.
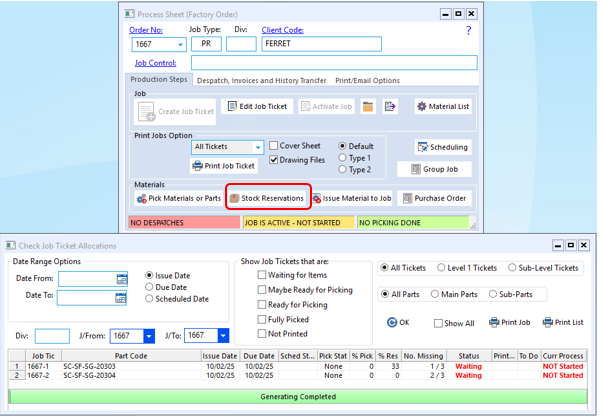
The Stock Reservations checks the job ticket allocations with filters for date range, and issue, due or schedule date and other tick boxes, radio button and print options.
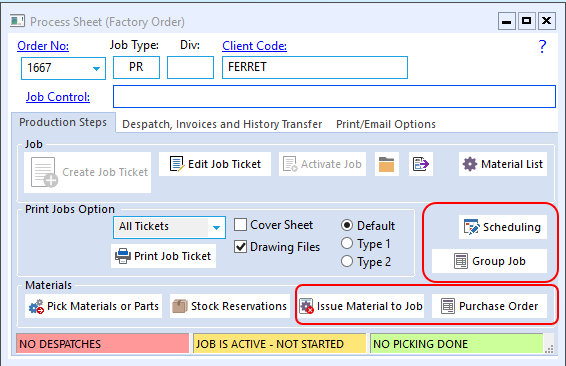
The Issue Material to Job enable the user to issue any extra and/or unexpected items to the job tickets. The Purchase Order option allow the user to create a purchase order for items from the Process Sheet window. The Scheduling option allow the user to see how the scheduling of the job tickets looks and save it if suitable. The Group Job option is used for purchasing same items across multiple job tickets into a purchased group.
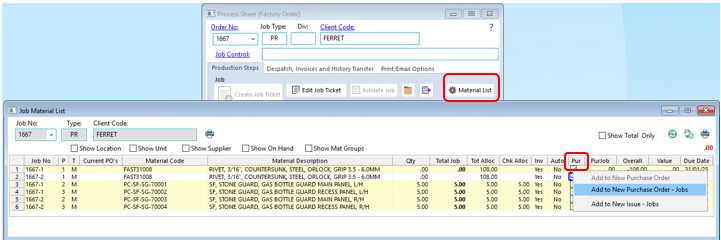
The Material List icon displays the materials required for the job tickets and whether there are allocation and the correct on hand quantities. Required materials can be purchased from this window by ticking the box in the ‘Pur’ column and then doing a right mouse click and select ‘Add to Purchase Order’.
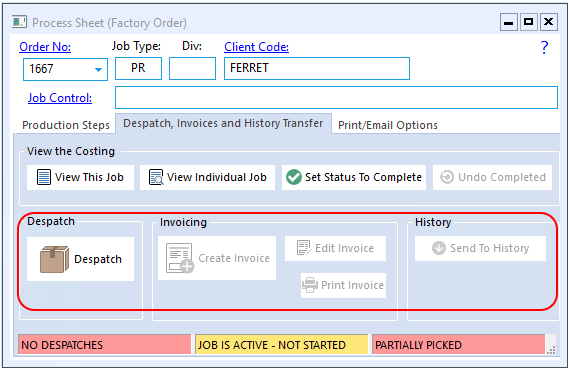
The Second tab has the Despatch, Invoice and History Transfer functions-
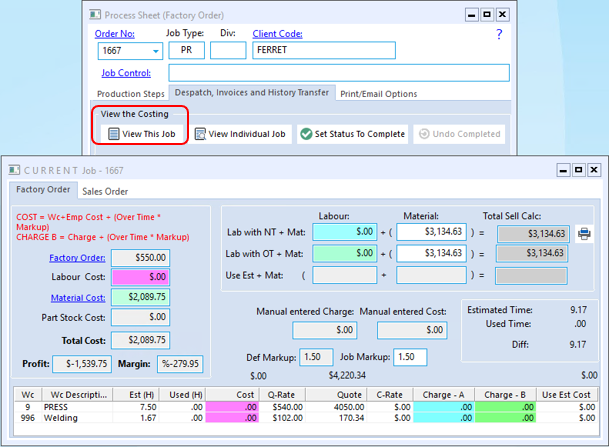
The View This Job options opens the Job Cost Summary window
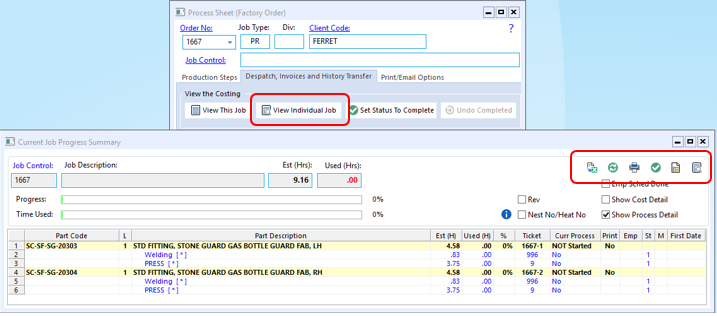
The View Individual Job option opens the Job Progress Summary window. In this window the user can access window to show the Process Control window to see the clocking history for the job tickets, also the completed processes, the scheduling and job costings.
There are options to change the Job Status to Complete and also to undo the completed process if necessary.

You can Despatch the order, invoice the Despatches, edit and print the invoice/s and also Send the Order to History when complete from the second tab. The icons become active as each step is completed.
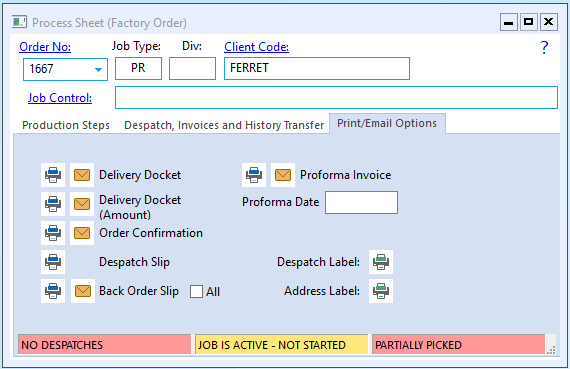
Finally, we have the third tab that has the options to print and/or emails all the documents in regards to the order and also print despatch and address labels if setup.
Opto Software Pty Ltd
Revised: 28/01/25