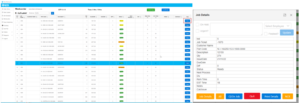
If we would like to manually nest our jobs, from the Laser Unscheduled Window we can build our nests.
- Select Laser Unscheduled from the ribbon
- Select the Nesting/Material Group Tab
- Select the material group we would like to nest
- Select the Job Tickets we would like to nest, alternatively we can press Select All
- Pressing Create Nest will create the nest from the selected jobs
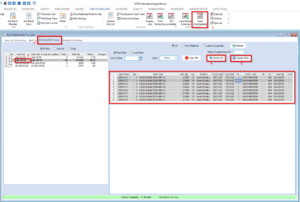
From there we can schedule the nest to our capacity. We can adjust nest details from this window by double clicking the nest number
- Select the Nesting Scheduling Tab
- Press refresh
- We can select our nests in the order we would like to schedule them. The order will show under the Pos column
- Press the green action button to confirm our selection
- We can press the blue action button to schedule the first available slot in our capacity
- The save button will lock in our scheduling
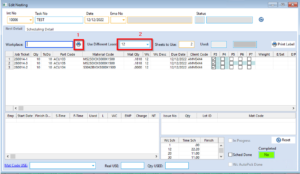
By double clicking the nest number we can edit the nest
- The print icon will print a nesting slip
- This will change the WC we would like to use
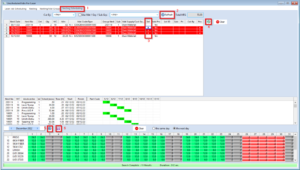
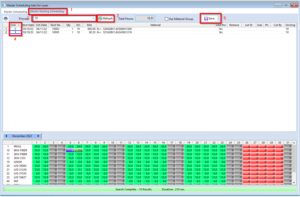
From the Master scheduling window
- Select the Master Nesting Scheduling tab
- Select the workcentre
- Press the green refresh button
- We can manually change the ordering of our nests by numbering from 1 to x in the ord column
- Pressing save will lock in our changes
Our nest will then become visible under the Workcentre on the Webapp. The user can press View to clock onto the nest.