Overview
The Edit an NCR/ECR option allows the user to edit, add to or resolve and finalise records that have been raised. It also enables authorised people to manage the raised issues in line with correct quality procedures. The process of navigating through the NCR/ECR process involves 5 steps:
- New Record is created
- The Problem is Described and Investigated
- Immediate and Preventative Action is identified and implemented
- The issue is Resolved
- Issue is finalised (Verified)
The status box at the bottom left of the window, displays where the record is at in the quality process.
Open the QUALITY tab and click on the ‘Edit NCR/ECR’ icon to open the edit window.

Press <F2> and select the required NCR/ECR record number from the pop-up list and click OK and then press <TAB> to generate the details. Edit details where necessary and press <F9> to save any changes – (the “Problem Description” should have already been completed by whoever raised the record). Enter additional information or edit existing information. Enter or edit details of any investigation findings in the “Investigation Details” area. Press <F9> to save or click on the “Immediate Action” tab to continue the process.
In the “Immediate Action” tab type in a description of what actions have been taken to rectify the issue. Click in the “Root Cause” field, press <F2> and select a cause from the pop-up list, and then click OK. Select appropriate options from the radio buttons, and if the item has to be repaired or a process needs to be re-done, tick the “Rework” box. Click in the “Actioned By” field and enter the user’s employee number or press <F2> and select the relevant person from the pop-up list and click OK. Press <TAB> to display name, this step requires the employee to have the correct permission and their password is needed to progress. Enter the password and click OK.
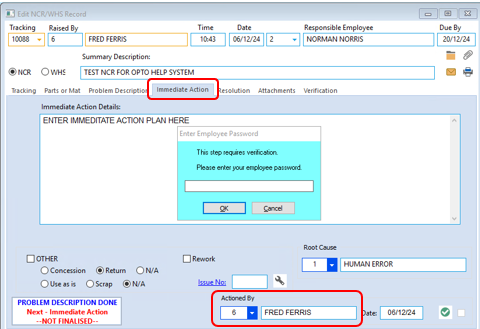
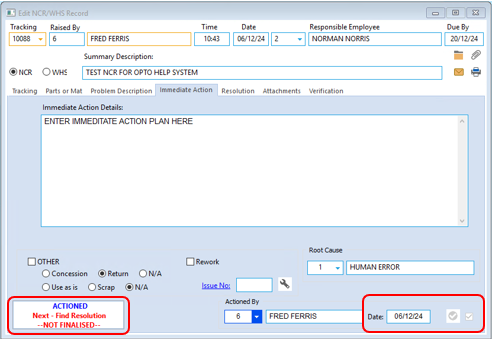
The date is automatically generated and click on the Confirm icon. Press <F9> and save or proceed to the Resolution tab.
Click on the “Resolution” tab – enter a description of the corrective measures developed and implemented to eliminate or reduce the possibility of the issue happening in the future in the “Corrective Actions” field. Click in the “Preventative Action Details” field and enter the action to be taken to prevent the issue happening in the future.
Click in the “Resolved By” field, select relevant name from the pop-up list, click OK, press <TAB> to display name, this step also requires the employee to have the correct permission and their password is needed to progress. Enter the password and click OK.
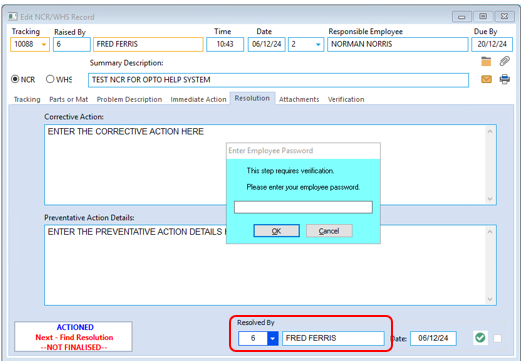
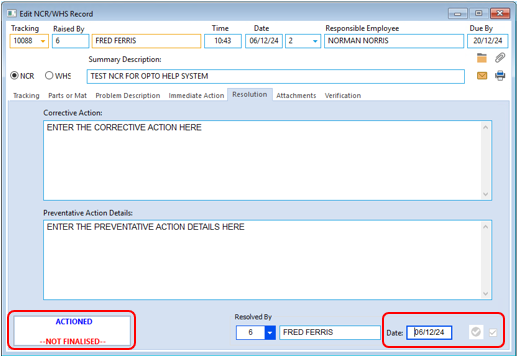
Then click on Confirm icon, the status changes to ACTIONED
The ‘Attachment’ tab is used for attaching any relevant items in relation to this record. The attachments may be drawings, plans or instructions. There may also be photos, statements, or company procedural forms / reports, etc. To attach a file, click in the “Document ID” field, if the documents are stored in the Document feature of the QMS module then double-click to display the list and select. Press <TAB> to generate the “Description” or enter a description for the attachment and then Press <TAB> to move to the “Filename” field and double-click to browse for the item to attach. Click on the required file to highlight and click on the Open icon. To view the attached document, click on the paperclip icon in the top right of the window.

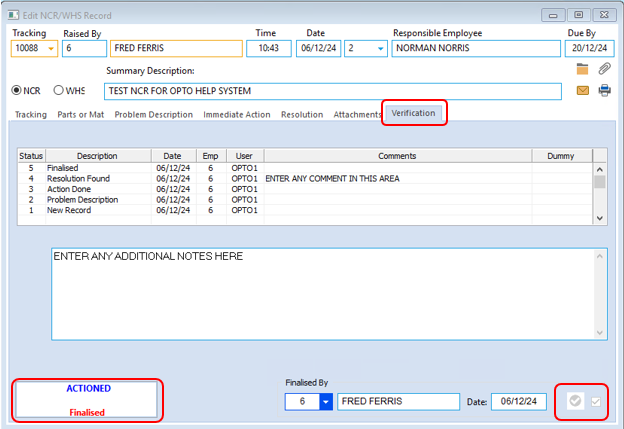
The final step is the Verification of the record, this is to establish that the information in the record is true and correct. Click on the ‘Verification’ tab and enter any relevant information in regards to verifying that this record has undergone thorough investigation and the correct quality management procedures have been followed. Only authorised employees will be able to verify the record and they must have permission and an internal employee password.
Click in the ‘Verified By’ field and the ‘Enter Employee Password’ pane appears
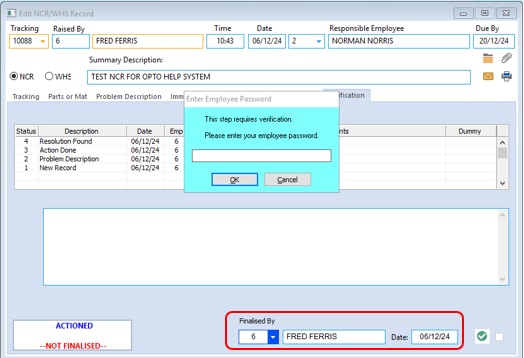
Enter your internal password and click on OK.
Click in the “Verified By” field again and enter the employee number or press <F2> and select the relevant name from the pop-up list. Click OK and press <TAB>, the date will automatically be applied, and then click on Confirm. Press <F9> to save the completed record.
Opto Software Pty Ltd
Revised: 06/12/24
